

This is Part 1 of a two part series.
- Part 1: How to run your own email server with Mail-in-a-Box [this article]
- Part 2: How to migrate your email to Mail-in-a-Box
Summary
I've written about email security[1] and the privacy of mobile communications before and, in these days of mass electronic surveillance, privacy concerns have come to the fore and are no longer just the preserve of the tin foil hat brigade.
When you also consider the recent (and very public) rise of blockchain (if you use a screen reader or similar accessibility tool, use this link for the Blockchain article), it's easy to see why people are becoming a lot more aware of some of the benefits of decentralization.
With this in mind, I decided it might be fun to host my own email server. And since the whole affair was a lot less painful than I'd anticipated, this short series of articles explains how I did it. In Part 1 [this article] you'll see how easy it is to set up your own email server and then, in Part 2, you'll discover how to migrate your mail across, with zero downtime and without losing any messages.
My intention is that, once you've completed Part 1 and created their accounts on the new email server, you should be able to refer your users to Part 2 and that they should be able to migrate their accounts themselves. Part 2 also contains simple explanations of some of the more abstruse terms (which your users can safely ignore, but which they may find interesting).
Background
Email is, fundamentally, a decentralized system. It's possible for anybody to set up their own email server and, when Ray Tomlinson sent the first email over the ARPANET late in 1971, it's unlikely that his intention was that this method of communication should become dominated by a few massive companies such as Google and Microsoft[2].
That being said, it's only natural that you might find the idea of running your own email server to be rather daunting; I certainly did. However, once I read about Mail-in-a-Box, I changed my mind. Especially when you consider that email is not actually as time-sensitive as some of your correspondents might like you to believe; having to reboot the server occasionally is not as big a deal as it is with a web server, for example.
What is Mail-in-a-Box?
Mail-in-a-Box is, as the name (somewhat) implies, an email server which is simple to set up and administer. Not only that, it offers a nice webmail interface, has a clean and simple web-based administration portal, is free and offers a whole host of other benefits besides. In fact, just read the following excerpt from the home page:
Each Mail-in-a-Box provides webmail and an IMAP/SMTP server for use with mobile devices and desktop mail software. It also includes contacts and calendar synchronization.
The box also includes automatic DNS configuration, spam filtering, greylisting, backups to Amazon S3, static website hosting, and free TLS (SSL) certificates from Let’s Encrypt. Your box can host mail for multiple users and multiple domain names.
It implements modern mail protocols (SPF, DKIM, and DMARC) and the latest security best practices, including opportunistic TLS, strong ciphers, and HSTS. When enabled, DNSSEC (with DANE TLSA) provides a higher level of protection against active attacks. Exchange ActiveSync is also available as a beta feature.
It sounds pretty good, doesn't it?
Note that some of these terms are explained in more detail in one of the parts of my series about email security. Unfortunately, they're in one of the parts I have not yet written. When I fix that, I'll put a direct link here[3].
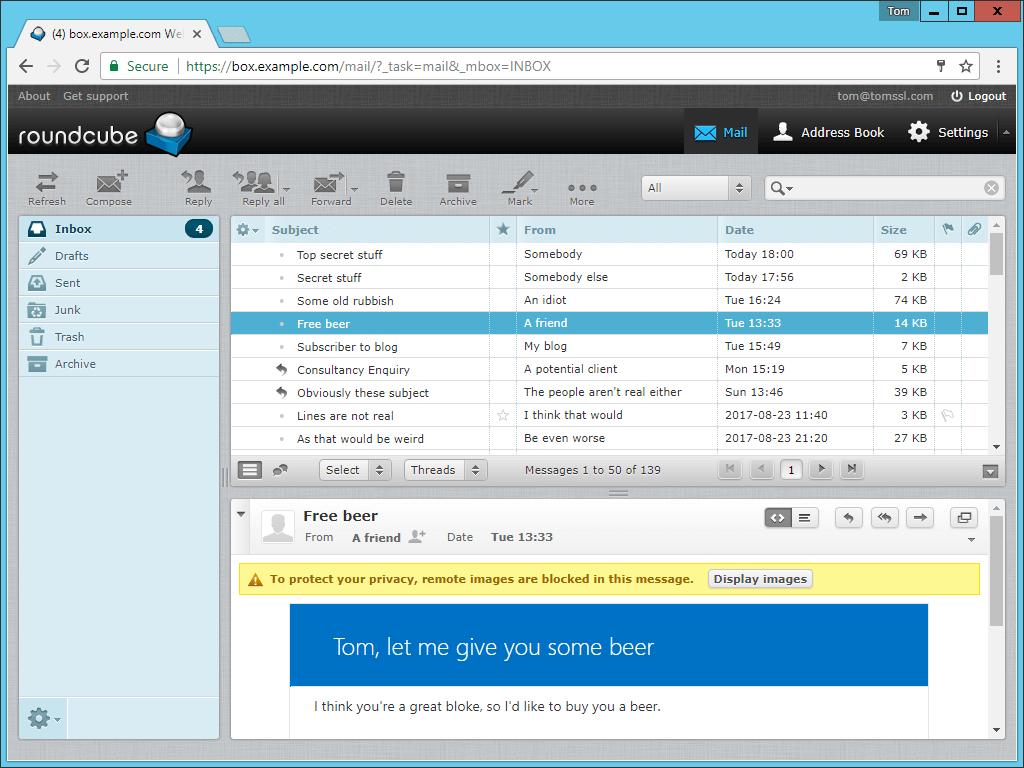
Here is a picture of the Roundcube webmail interface (I have tweaked it a bit to remove some private information and to incorporate a subliminal message). You can read more about it at https://roundcube.net/
Some nice features of Mail-in-a-Box
The following information is taken from the administration portal of my server and it explains some of the features of Mail-in-a-Box.
Greylisting
Your box using a technique called greylisting to cut down on spam. Greylisting works by delaying mail from people you haven’t received mail from before for up to about 10 minutes. The vast majority of spam gets tricked by this. If you are waiting for an email from someone new, such as if you are registering on a new website and are waiting for an email confirmation, please give it up to 10-15 minutes to arrive.
+tag addressesEvery incoming email address also receives mail for +tag addresses. If your email address is [email protected], you’ll also automatically get mail sent to [email protected]. Use this as a fast way to segment incoming mail for your own filtering rules without having to create aliases in this control panel.
Use only this box to send as youYour box sets strict email sending policies for your domain names to make it harder for spam and other fraudulent mail to claim to be you. Only this machine is authorized to send email on behalf of your domain names. If you use any other service to send email as you, it will likely get spam filtered by recipients.
It sounds like it might be a lot of work. Is it?
No. The installation script is very simple to follow and, once it's up and running, it installs security updates automatically. Sometimes, when you log in to the web-based administration portal, it will invite you to reboot the server (by clicking on a red button), but it's fine to leave the whole thing alone for the most part.
And, of course, it's an Ubuntu server, so you can upgrade it by doing this:
sudo apt-get update && sudo apt-get upgrade
And you can reboot it via sudo reboot when prompted. As previously mentioned, the admin webpage also tells you this (possibly by checking for the existence of a file at /var/run/reboot-required) and it even lets you reboot it via the web interface. There's more information about all of this at: https://mailinabox.email/maintenance.html.
Can it handle email for more than one domain?
Yes. What's more, the initial setup of users and email aliases is very easy, as is the addition of extra domains. To add a new domain to the box, you simply add a new email address using that domain (either via the web portal or the API) and it automatically sets up the DNS records on the box. Therefore, if you either change the nameservers of that domain to be your Mail-in-a-Box (adding any existing DNS records to your box), or add the records it created to your existing DNS provider, you're all set. But please read Part 2 before doing this to ensure you don't have any issues during the transition.
Choosing a hosting provider
You need a clean Ubuntu 14.04 LTS x64 installation with at least 1GB of RAM (although apparently you can get away with 768MB if you have a large enough swap space). For various reasons, including the fact that your home internet provider probably blocks port 25 and may explicitly prohibit you from running your own email server, it's probably best to rent a virtual private server (VPS) somewhere.
Think about where you want to host it. If you live somewhere where you're not allowed to rent a server in the location you want, either use a different provider or, as long as you're not violating any terms of service, get a friend or relative to order the server such that you can administer it. e.g. If you have family members all over the world and you're going to create a family email server, does it really matter which one of you registers it?
After an abortive attempt at renting a VPS from one company, during which they cancelled my account twice (without telling me on either occasion), I decided to use Digital Ocean[*] and I should just have done that in the first place. If you want to get a free $10 credit with Digital Ocean, then use this mutually beneficial affiliate link: Digital Ocean[*]. It will probably pay for your first month of hosting.
Installing Mail-in-a-Box
The installation is really very straightforward. There's a guide at https://mailinabox.email/guide.html and you should simply follow that. You might find the video version of the tutorial helpful (although it's several versions out of date). It's on the homepage and is linked to from the guide.
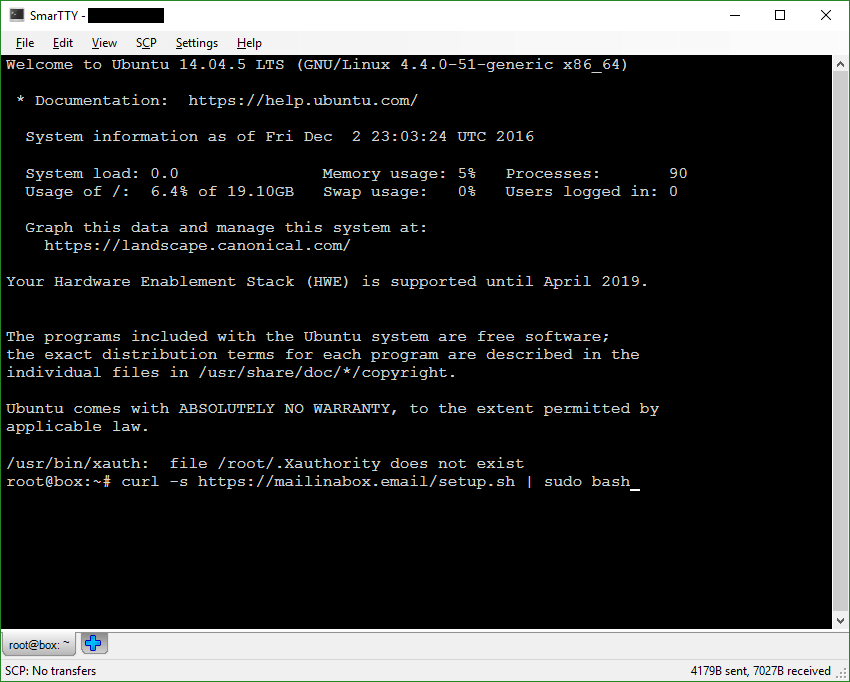
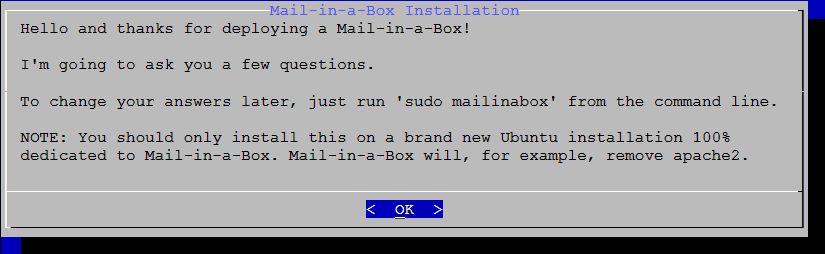
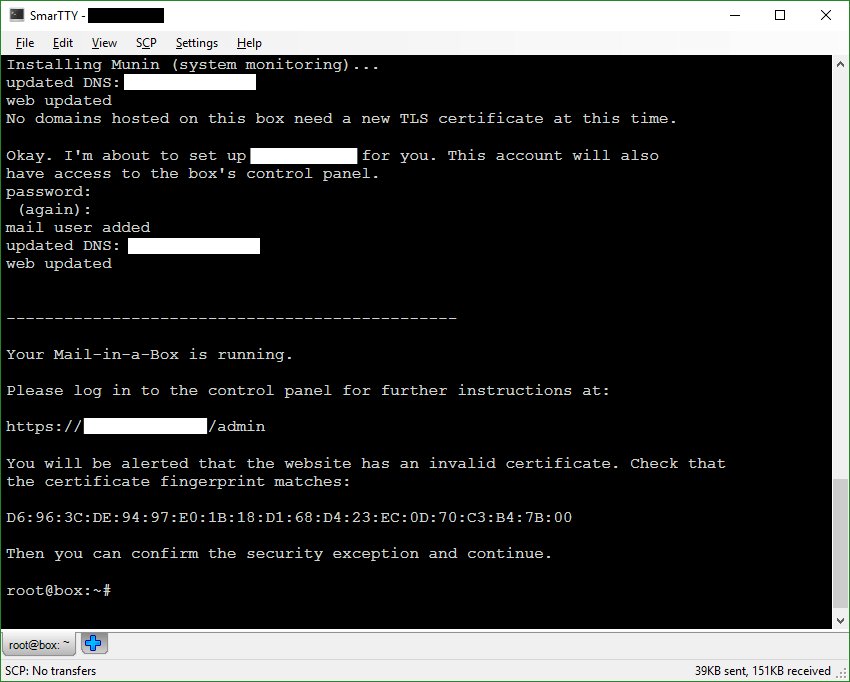
Having said that, I did grab some screenshots when I did my original installation and, since they support my claim of how easy it is to install, here they are.
Starting the installation
The graphical installer
Finishing the installation (note the warning about the invalid SSL certificate)
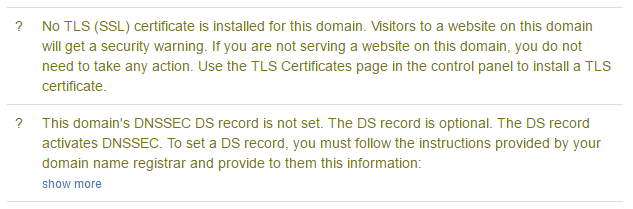
Part of the administration web portal status view before SSL and DNSSEC DS are setup correctly
The same part of the administration web portal status view after SSL and DNSSEC DS are setup correctly

A few useful notes
-
When I did the initial installation of Mail-in-a-Box, Roundcube webmail didn't work at first (sorry, I didn't get a screengrab), so I ran
sudo mailinabox(which is always safe to run, being idempotent[4]) and, when it got to the bit about installing Roundcube, it suddenly worked. There have been several updates since then, so I don't suppose you'll have the same problem but, if you encounter a similar problem, now you know what to do. -
If you want to use an external DNS provider, you will get a few errors. They can safely be ignored: https://discourse.mailinabox.email/t/mail-in-a-box-using-cloudflares-dns/1111
-
Also, if you set DNSSEC at CloudFlare (and then store the key it gives you at your DNS registrar), don't worry that your server will complain about that too. Here's a forum post from Josh Tauberer (the creator of Mail-in-a-Box) saying that it's okay: https://discourse.mailinabox.email/t/cloudflare-external-dns/928/6
-
It's also worth mentioning that Mail-in-a-Box supports any top-level domain if you host DNS elsewhere: https://discourse.mailinabox.email/t/answered-no-you-cant-anyone-have-a-is-domain-working-with-miab-dns/1077/6
Conclusion
In this article you learnt how you can run your own email server, providing a nice webmail interface and lots of good security features, with a minimum of effort. By starting with a clean installation of Ubuntu 14.04 x64 LTS, within a few minutes you can be running a state of the art email server (which probably offers better features than your existing email provider). Not only that, but all of the software used is free.
Check out Part 2 for full instructions on how to migrate your existing email accounts to your new Mail-in-a-Box server, as well as some simple explanations of some of the terminology involved.
Don't forget to let me know how you get on in the comments section below and follow me on Twitter for more frequent updates. Follow @TomChantler
All images created by me, except the main padlocks header image which was created by: bluebay/Shutterstock.com
It's time I finished writing my series about email security. ↩︎
And Yahoo! at one point, but surely not any more in light of their massive data breaches, which even have their own Wikipedia page. ↩︎
This bit looks like the sort of thing I might mean to change prior to publication but, since it's true and I haven't written that blog post yet, it's staying in. ↩︎
I can't be the only one who's been asked to define idempotence in a job interview. ↩︎