Summary
Having recently installed WSL 2 (using Ubuntu 20.04) on my main Windows 10 machine and integrated it with Docker (more about that another time), I decided to change one of my apps to run inside Linux containers in Docker. That was easy enough, but it ran on port 80 using HTTP by default. That's not really good enough, so I decided I'd change it to use HTTPS and it was more difficult than I'd anticipated. In this article I'll explain how I got the development SSL certificate to work (and you'll see how it could be extended to use real certificates as well, although there are many other ways you might want to achieve that).
Background
Today I was doing some work on an ASP.NET Core 3.1 app and, as I was about to start adding some more applications to the solution, I decided that it would be a good idea to get everything to run in Docker using Linux containers. I right-clicked on the Project file in Visual Studio 2019, chose Add → Docker Support... and it worked fine. Then I thought it might make more sense to do the same again, but to choose Add → Container Orchestration Support... and then choose docker-compose. And it still worked fine. But it only ran on port 80 using HTTP. It's not been okay to run web applications over plain HTTP for a long time and, since it's important for the development environment to be broadly the same as the production environment, I needed to get my app to run over HTTPS.
At first, I thought I could just change the Dockerfile to add port 443, changing EXPOSE 80 to become EXPOSE 80 443 and then mapping those ports in the docker-compose.yml file, but that didn't work.
The problem seemed to be getting it to trust the self-signed certificates from within the Linux container environment and there are a lot of articles online which tell you how to make that work, but I couldn't get any of them to work.
Procedure
.NET comes with the global command line tool dotnet and, for a couple of years (I think since .NET Core 2.1 came out. almost exactly two years ago), it's been possible to create and trust your own development SSL certificate using a dotnet command.
To get this to work in Docker using Linux containers, you will need to create your dev certificate and then export it into a password-protected .pfx file and then import that into your container. That sounds fairly straightforward, but everything I read online (and I read a lot) didn't actually work.
After quite a lot of trial and error, here is what I found worked best.
1. Remove your existing dev certificate(s)
Open a PowerShell prompt and run:
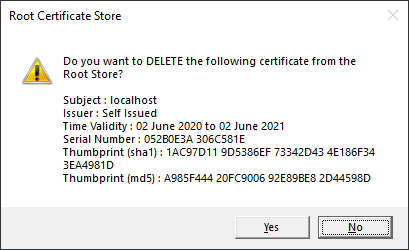
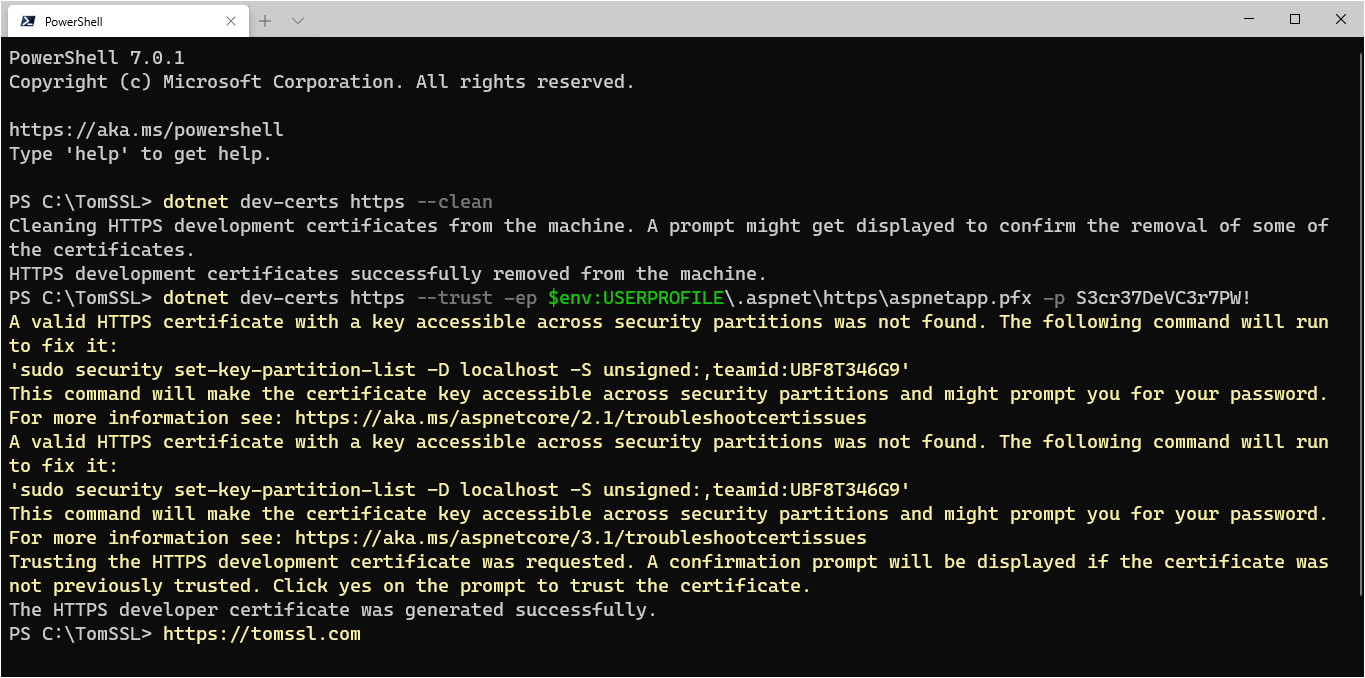
dotnet dev-certs https --cleanIf you've already got a certificate installed, it will pop up a Root Certificate Store window asking you to confirm this.
2. Create, trust and export your new development certificate
Next you need to generate a new self-signed certificate, trust it and also export it to a password-protected .pfx file, all in a single step, otherwise it won't work properly.
In the same PowerShell prompt, run the following command, replacing SECRETPASSWORD with a secret password of your own choosing:
dotnet dev-certs https --trust -ep $env:USERPROFILE\.aspnet\https\aspnetapp.pfx -p SECRETPASSWORDThis will create and trust your dev certificate and export it to C:\Users\[USERNAME]\.aspnet\https\aspnetapp.pfx. It will pop up another window asking you to trust the new certificate.
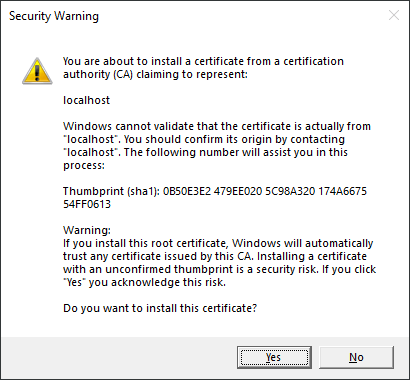
As previously mentioned (and despite documentation to the contrary), I had to do all of this in one single command, or it didn't work properly.
NOTE: You will find articles saying you should refer to your user profile directory by using
%USERPROFILE%or~, but these won't work when runningdotnet dev-certsin PowerShell, although you might not realise this straight away (it will just create folders with those names under the folder in which you execute the command). If you get strange errors aboutInterop+Crypto+OpenSslCryptographicException: error:2006D080:BIO routines:BIO_new_file:no such filein your container logs, it's quite likely that you can't find the .pfx file due to this reason. You need to use$env:USERPROFILE.Interestingly, you can navigate to the output folder using
cd ~/.aspnet/httpsand you can hit tab at any point to expand the~toC:\Users\[USERNAME](and change the other instances of/to\), but you can't refer to it using the~in thedotnet dev-certscommand.
When you run this command, you will notice that it gives you an insane message about running a sudo command.
A valid HTTPS certificate with a key accessible across security partitions was not found. The following command will run to fix it:
'sudo security set-key-partition-list -D localhost -S unsigned:,teamid:UBF8T346G9'
This command will make the certificate key accessible across security partitions and might prompt you for your password. For more information see: https://aka.ms/aspnetcore/2.1/troubleshootcertissues
A valid HTTPS certificate with a key accessible across security partitions was not found. The following command will run to fix it:
'sudo security set-key-partition-list -D localhost -S unsigned:,teamid:UBF8T346G9'
This command will make the certificate key accessible across security partitions and might prompt you for your password. For more information see: https://aka.ms/aspnetcore/3.1/troubleshootcertissues
Trusting the HTTPS development certificate was requested. A confirmation prompt will be displayed if the certificate was not previously trusted. Click yes on the prompt to trust the certificate.
Don't worry about it. This is a known issue and will presumably be fixed soon.
At this point we've run two simple PowerShell commands and have created a new development SSL certificate, added it to the trusted root store and exported it as a password-protected .pfx file. Next we just need to get it to work in Docker.
3. Modify your Dockerfile to expose port 443
As I already alluded to in the Background section of this article, you need to modify the Dockerfile for your app and change EXPOSE 80 to become EXPOSE 80 443.
4. Add your certificate to your docker-compose.override.yml file
Now all that remains to be done is to add your new certificate to your docker-compose.override.yml file, so that it will be installed in the container to be used when you run your application(s) locally. You will also need to modify docker-compose.yml to include port 443 if you haven't already done so, like this (you'll see I am not running any other services on my dev machine, so I am mapping the ports directly):
version: '3.4'

services:
  tomssl.app:
    image: ${DOCKER_REGISTRY-}tomssl-app
    ports:
     - 80:80
     - 443:443
    build:
      context: .
      dockerfile: src/TomSSL.App/Dockerfile
And you need to modify the Environment: section of docker-compose.override.yml to update the URLS, add the path to and password for the .pfx file and also add a volumes: entry, to map the file location. Like this:
version: '3.4'

services:
  tomssl.app:
    environment:
      - ASPNETCORE_ENVIRONMENT=Development
      - ASPNETCORE_URLS=https://+:443;http://+:80
      - ASPNETCORE_Kestrel__Certificates__Default__Password=SECRETPASSWORD
      - ASPNETCORE_Kestrel__Certificates__Default__Path=/https/aspnetapp.pfx
    volumes:
      - ~/.aspnet/https:/https:ro
Make sure you use the password that you set when you created (and exported) your certificate in step 2.
And that's it.
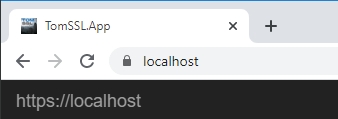
Now when you run your app, it will run over HTTPS in Docker, like this:
Troubleshooting
Depending on how you've set up Docker, you might get a strange message about Could not find the global property 'UserSecretsId' in MSBuild project 'C:\path\to\project.csproj'. Ensure this property is set in the project or use the '--id' command line option. when you try to run your Docker container(s). If that happens (and it might not), then you just need to create the UserSecretsId in your .csproj file. To do this you can either edit the .csproj file directly and simply add a UserSecretsId value to the top main PropertyGroup, so that the top of the .csproj file now looks like this (it's usually a GUID, but it can be any text you like, as long as it's unique and can be used as the name of a directory):
 <PropertyGroup>
    <TargetFramework>netcoreapp3.1</TargetFramework>
    <DockerDefaultTargetOS>Linux</DockerDefaultTargetOS>
    <DockerfileContext>..\..</DockerfileContext>
    <DockerComposeProjectPath>..\..\docker-compose.dcproj</DockerComposeProjectPath>
    <UserSecretsId>f9753959-3692-4c8c-a8ae-69f3c7a75ef8</UserSecretsId>
  </PropertyGroup>
Or you can right-click on the project in Visual Studio and click "Manage User Secrets" and it will add it for you.
Th is used to store development user values in a secrets.json stored in a folder in $env:USERPROFILE\AppData\Roaming\Microsoft\UserSecrets with the folder being the same as the UserSecretsId value which you added into the .csproj.
But don't worry too much about it. If you need to store User Secrets, you may already have done this and, if you get this specific error when you try to run your project in Docker, you can fix it by adding a single line to your .csproj.
Conclusion
Running ASP.NET Core 3.1 over HTTPS in Docker using Linux containers can be tricky to set up, but is actually very easy once you know what to do. And now you do. You just need to run a couple of PowerShell commands (literally two) and make some small modifications to your docker-compose files.

