
How to upgrade your Ghost blog to the latest version without breaking anything - Part 2
Summary
In part one of this series of articles, we exported everything from our existing Ghost installation and (optionally) applied various fixes to that exported data. This time we're going to get everything installed by running a single command which will download and execute a script I've written to do just that. There's also a fairly lengthy explanation of what's going on behind the scenes, but you probably don't need to read that bit. If you don't already have a blog up and running and you want to set one up from scratch, then you only need to read this article on its own.
- Part 1: Overview and data export/fix
- Part 2: The best way to install Ghost on your server [This article]
- Part 3: Installing and upgrading using a temporary domain and final steps (sorting out redirects, migrating comments, fixing DNS entries, etc)
- Bonus: How and why you should change your blog URLs to dateless format
Background
Last time, I gave an overview of what I was trying to achieve and it's definitely worth reading if you're upgrading from an older version of Ghost.
Procedure
The first thing you need to do is choose where you're going to host your blog. I am hosting this site on Ubuntu 18.04 LTS at UpCloud[*] (that's an affiliate link; if you use it you'll be given $25 of free credit once you top up your account with $10 and I will also receive some credit to help pay for my hosting). I have found UpCloud to be extremely good and you can run more than one site quite easily in a VM costing $5 so, if you use my link, the first seven months will only cost you $10 in total.
Another popular host is Digital Ocean [*] (I use them for some of my other projects) and that link gives you $100 in credit to use over 60 days (and then, once you've spent $25, I get some money).
I've tested this script successfully on both hosts using $5/month VMs. I also tested it on a B1S Ubuntu VM on Microsoft Azure.
Not only that, you could host it for free for a year on Azure. If you open a new Azure account, as well as getting $200 to spend in your first 30 days, you also get 12 months free for certain services, including the B1S VM I used to test this installation. Check it out at https://azure.microsoft.com/en-us/free/ (I guess I should probably check to see if I can get an affiliate link there; if I do, I'll let you know).
Step 0: Create a DNS entry for your temporary migration URL
The aim here is that we're going to install Ghost using a temporary URL, get everything up and running properly (whilst our existing site is still live) and then switch over once we're happy that everything is working okay.
Since my blog runs at tomssl.com, I created an A record called blog.tomssl.com, pointing to the IP address of my UpCloud server. I didn't want to give it a totally random name as I wasn't sure if the Ghost installation might make some filename choices based on the name that would be difficult to change later.
Once you've created your new DNS record, you should check that your Ubuntu server can resolve it by running a simple ping command. e.g. ping blog.tomssl.com (remember, you need to ping your temporary domain, not the final domain).
Step 1: Install Ghost on your new server
The official guide for installing Ghost on Ubuntu is pretty good and you should certainly consider reading it. However, if you're coming from an ancient version of Ghost, or if you might be going to upgrade an older version later on (remember, you can easily host more than one site on your VM), you'll need to make a few changes.
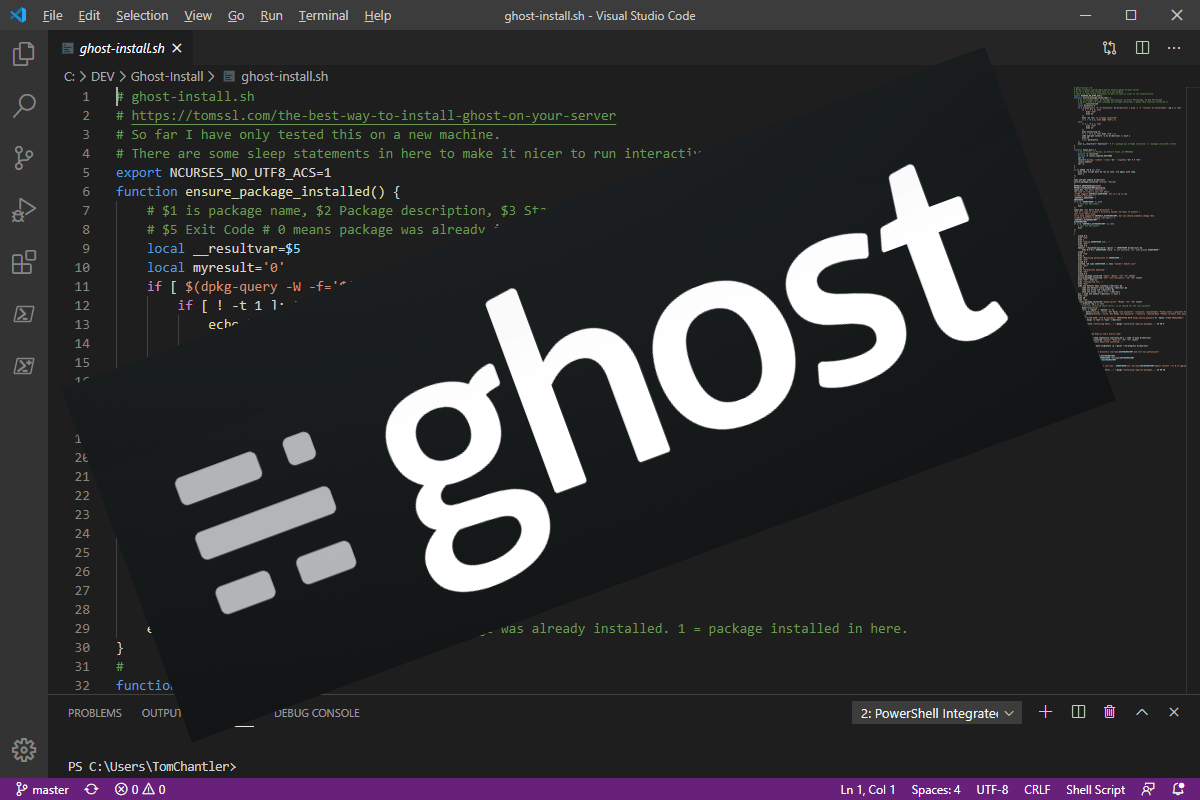
I've written a script to do all of this. Once you've logged in to your new server, just run the following command and follow the on-screen prompts:
Install Ghost on Ubuntu with a single command:
curl -L -s https://tomssl.com/ghost-install.sh | sudo -E bash
You need the -L to tell curl to follow redirects, as that URL is a pointer to a raw file in my GitHub account. You can check that for yourself by running the curl command without -L:
$ curl -s https://tomssl.com/ghost-install.sh
Found. Redirecting to https://raw.githubusercontent.com/TomChantler/Ghost-Install/master/ghost-install.sh
Here's what happened when I ran curl -L -s https://tomssl.com/ghost-install.sh | sudo -E bash on a brand new Ubuntu server in UpCloud[*]:
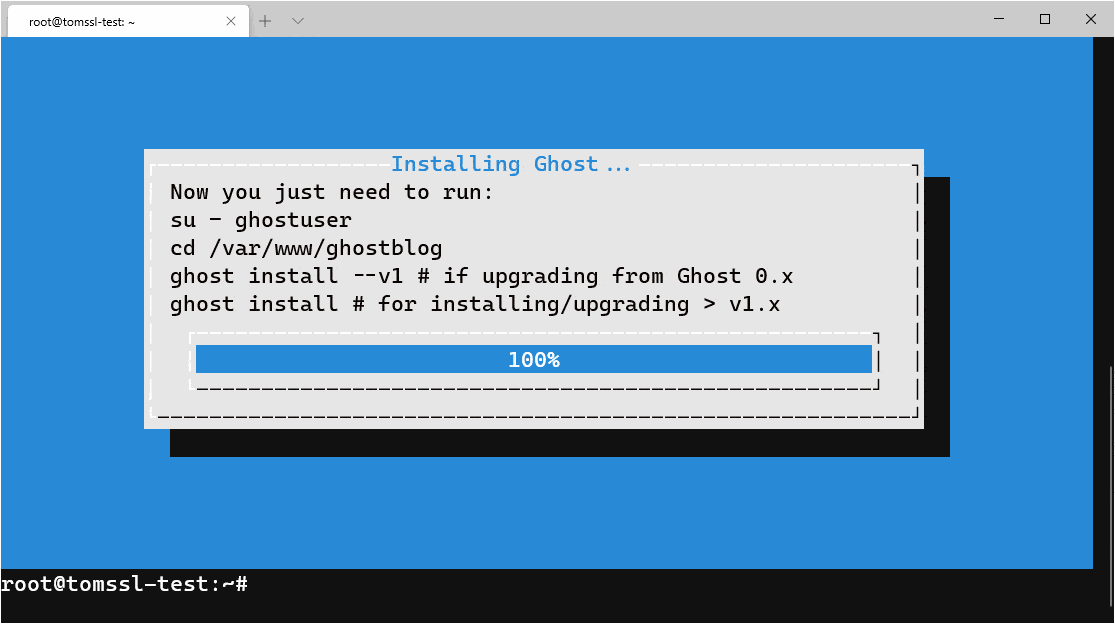
After you've done that, you just need to install your blog. The final screen of the install script actually tells you precisely what to do, so let's have a look at it:

NOTE: When testing on Azure and on Digital Ocean, I found I had to set a password for the ghost user (which I didn't have to do on UpCloud).
After installing Ghost with my script, I had to run this command before switching user and installing my blog (whereghostuseris the name you chose when running the script):
sudo passwd ghostuser
To install a new blog, just run:
su - ghostuser
cd /var/www/ghostblog
ghost install
If you're upgrading from Ghost v0.x, then you need to run ghost install --v1 instead, which will install Ghost v1.26.2. Then you need to import your blog and then you can update it to the latest version. This is what I had to do, but it's not exactly onerous.
Here's an animated gif showing me installing a v1 blog.
Step 2: Importing and upgrading your old blog
This will be covered more fully in the next article in the series. In brief, now you can login to your new blog and go to Settings → Labs → Import Content and upload the json file you exported and fixed in part 1 of this series. Then you can upload the images folder that you also prepared in the last article. It will need to go in www/var/[YOURBLOG]/content/images.
Then you can upgrade it to the latest version by going to the home directory for the blog /var/www/[YOURBLOG] and running ghost update, like this:
And that should be it. If you don't want to know anything more about what you did and why, you can stop reading now.
You only need to read this next bit if you want to know what's going on behind the scenes in the install script.
How to install manually
The rest of this article tells you what to do if you want to install Ghost by hand. If you reckon that I might have written this next bit first and then decided to write a script to automate it, then well done you.
If you've run the single command above and installed Ghost and you really don't care about what it was doing, then you can stop reading. This isn't an explanation of precisely what the script is doing, either, because a lot of the stuff in the script is just me trying to make it nice to use. I might explain some of it another time if anybody's interested.
Here is the stuff the script is doing behind the scenes.
Create a new user and assign their rights
I've included the three commands and all the output (including the fact that your prompt is going to change).
The procedure is, simply:
adduser ghostuser, which creates a user called ghostuser. Give the user a strong password, but you don't need to put anything sensible for the user information.
usermod -aG sudo ghostuser, which adds the user to the sudoers group (i.e. gives them admin rights).
su - ghostuser, which starts a login shell as ghostuser ( su means substitute user).
Here's the output. Notice how the prompt has changed at the end (and remember that the root user has # as a prompt, whereas other users have $).
root@tomssl:~# adduser ghostuser
Adding user `ghostuser' ...
Adding new group `ghostuser' (1001) ...
Adding new user `ghostuser' (1001) with group `ghostuser' ...
Creating home directory `/home/ghostuser' ...
Copying files from `/etc/skel' ...
Enter new UNIX password:
Retype new UNIX password:
passwd: password updated successfully
Changing the user information for ghostuser
Enter the new value, or press ENTER for the default
        Full Name []: Ghost User
        Room Number []:
        Work Phone []:
        Home Phone []:
        Other []:
Is the information correct? [Y/n] Y
root@tomssl:~# usermod -aG sudo ghostuser # adds ghostuser to the sudoers group
root@tomssl:~# su - ghostuser # opens a terminal session as ghostuser
To run a command as administrator (user "root"), use "sudo <command>".
See "man sudo_root" for details.

ghostuser@tomssl:~$
We can do the rest of the installation as the newly-created ghostuser. You'll know this as the subsequent bash commands will start start with $ prompts.
Update packages
$ sudo apt-get update && sudo apt-get upgradeInstall NGINX
$ sudo apt-get install nginxAfter installing NGINX, you should install and configure ufw if you haven't done so already. Here are the commands you'll need (don't forget to allow SSH connections, otherwise you'll be kicked out of your server and you won't be able to get back in; please don't ask me how I know this).
 sudo apt install ufw
 sudo ufw default deny incoming
 sudo ufw default allow outgoing
 sudo ufw allow ssh
 sudo ufw allow 'Nginx Full'
 sudo ufw enable
Now check the status of your firewall, like this:
ghostuser@tomssl:~$ sudo ufw status verbose
Status: active
Logging: on (low)
Default: deny (incoming), allow (outgoing), disabled (routed)
New profiles: skip

To                           Action      From
--                           ------      ----
22/tcp                       ALLOW IN    Anywhere
80,443/tcp (Nginx Full)      ALLOW IN    Anywhere
22/tcp (v6)                  ALLOW IN    Anywhere (v6)
80,443/tcp (Nginx Full (v6)) ALLOW IN    Anywhere (v6)

ghostuser@tomssl:~$
If everything is installed, but not enabled, you might see this:
ghostuser@tomssl:~$ sudo ufw status verbose
Status: inactive
Whereupon you can check to see which rules you've got in place, like this:
ghostuser@tomssl:~$ sudo ufw show added
Added user rules (see 'ufw status' for running firewall):
ufw allow 22/tcp
ufw allow 'Nginx Full'
Before enabling the firewall by running sudo ufw enable as before.
Install MySQL
Next we need to install MySQL and set a root password (so that we can use it with the Ghost-CLI).
$ sudo apt-get install mysql-server
$ sudo mysql
Welcome to the MySQL monitor.  Commands end with ; or \g.
Your MySQL connection id is 806
Server version: 5.7.30-0ubuntu0.18.04.1 (Ubuntu)

Copyright (c) 2000, 2020, Oracle and/or its affiliates. All rights reserved.

Oracle is a registered trademark of Oracle Corporation and/or its
affiliates. Other names may be trademarks of their respective
owners.

Type 'help;' or '\h' for help. Type '\c' to clear the current input statement.

mysql> ALTER USER 'root'@'localhost' IDENTIFIED WITH mysql_native_password BY 'REDACTED';
Query OK, 0 rows affected (0.01 sec)

mysql> quit
Bye
$
If you ever forget your MySQL password, it can be really tricky to reset it. I should probably write a short article about that and link it here.
Install Node.js
The version of Node.js you're going to install depends on the version of your blog you're going to install initially. Basically, if you're upgrading from an earlier version than v1.0, you'll need to install Node.js 10. The instructions tell you to install Node.js v12, but that won't allow you to upgrade an older blog.
$ curl -sL https://deb.nodesource.com/setup_10.x | sudo -E bash
$ sudo apt-get install -y nodejs
Install Ghost-CLI
Now we need to install the latest version of the Ghost-CLI.
$ sudo npm install ghost-cli@latest -gInstall Ghost
Now follow the rest of the installation guide, up as far as Install Ghost where it tells you to create a directory and then run ghost install.
It will make your life easier if you name your directory with a name based on your final url, not your temporary one. In my case, this meant that I created a directory at
/var/www/tomssl. Since I had created a user calledghostuser(you are advised against calling your userghost), that meant I did this:sudo mkdir -p /var/www/tomssl sudo chown ghostuser:ghostuser /var/www/tomssl sudo chmod 775 /var/www/tomssl cd /var/www/tomssl
Is your old installation earlier than v1.0?
At this point, if you're running a version of ghost which is older than v1.0, you're going to have to install v1.0 first, import your blog and then upgrade it (which is a simple procedure achieved with a single command, so don't worry).
If, like me, you're upgrading from a v0.x version, you need to install ghost like this:
ghost install --v1If it's v1.0 or newer, just run:
ghost installImport your data
Import your data. Copy your files. Set the permissions. Make sure it all looks reasonable.
Update Ghost to the latest version
It will prompt you to view a test page before migrating, but you don't really care about that as we have to do it anyway and it's only a test version until we sort it out and put it live.
$ ghost updateOptionally update Node.js to v12
Don't do this until you've updated your blog to the latest version. After you update node, you have to force Ghost to do another update, even though the version will be the same, just in case any of the dependencies have changed.
Update your source list with the version of Node.js you want to upgrade to and then run the install command again. It will install over the top of the old version.
$ curl -sL https://deb.nodesource.com/setup_12.x | sudo -E bash
$ sudo apt-get install -y nodejs
$ ghost update --force
Conclusion
In this article we saw an easy way to install Ghost on a new Ubuntu server, simply by running curl -L -s https://tomssl.com/ghost-install.sh | sudo -E bash. We also (optionally) found out perhaps more than we wanted to know about what that single command needed to do behind the scenes and why.
Next time, we'll import our old blog using a temporary domain and perform the final steps before going live (sorting out redirects, migrating comments, fixing DNS entries, etc).
Join the newsletter to receive the latest updates in your inbox.

Hire me for consultancy work


