
Summary
In this article you will learn how to write a simple application for the Microsoft Band. By the end of this tutorial you will have an application installed on your Windows Phone which will interact with your band. As usual, all of the code is in GitHub.
Background
I've been wearing a Microsoft Band since they were first released in the UK[1].
My @microsoftband just turned up. Exciting! :-) pic.twitter.com/Ov874uhDqL
— Tom Chantler (@TomChantler) April 15, 2015
And when they released the Microsoft Band 2, I got one of those on release day too.
My new @microsoftband has just arrived. Very exciting! pic.twitter.com/5nTG0eK49e
— Tom Chantler (@TomChantler) November 19, 2015
Since then I've been meaning to write some code to interact with the band, but I always seemed to have something more important to do.
A few days ago I managed to resolve the problem of this lack of urgency by agreeing to give a talk demonstrating how to write an application for the Microsoft Band. This was somewhat problematical as, at the time I made the offer, I had not yet even installed the SDK[2], let alone written any code[3]. Worse still, I had no idea what I needed to do. Thus, about a day and a half before the talk, I thought I'd probably better find out exactly roughly how to do it.
As luck would have it, it's very easy. If you follow along you will have something up and running in a few minutes.
Prerequisites
- A Microsoft Band (either version 1 or, preferably, version 2)
- A Windows Phone 10 device[4]
- A computer running Visual Studio 2015 (if you haven't already got it, just get a free version)
I realise that the second prerequisite might be a bit of a problem but, for this simple tutorial, it's necessary. I will probably revisit this tutorial using Xamarin at a later date but, to meet the exigencies of the situation in which I found myself (remember the imminent demonstration I'd agreed to give), I decided to stick with Windows Phone 10.
Applications do not run on the Band
Apparently you can't actually run an app on your band. It has to run on another device (in our case a phone, but it could be any other Windows 10 device) and send/receive data to and from the band.
Here is the salient information, taken verbatim from the SDK documentation:
The application logic runs on the host OS (iPhone, Android, Windows), and remotely controls the UI of the Band as
well as receives contextual information and sensor data from the Band.
Procedure
- Open Visual Studio 2015
- Create a New Project of type: Templates → Visual C# → Windows → Universal
→ Blank App (Windows Universal)
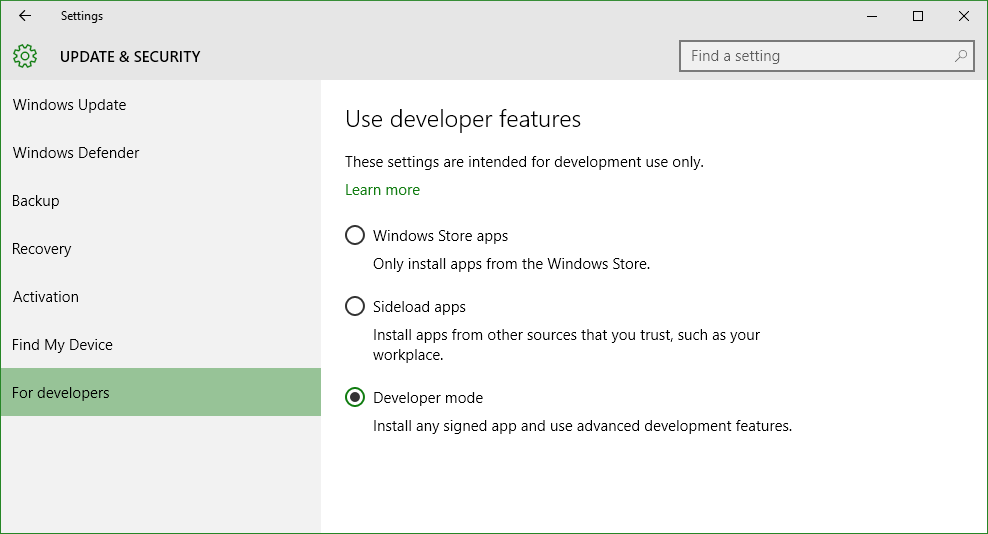
At this point you might get a warning that you're not in developer mode. So set that both on your desktop and also on your phone.
Enabling Developer Mode PC

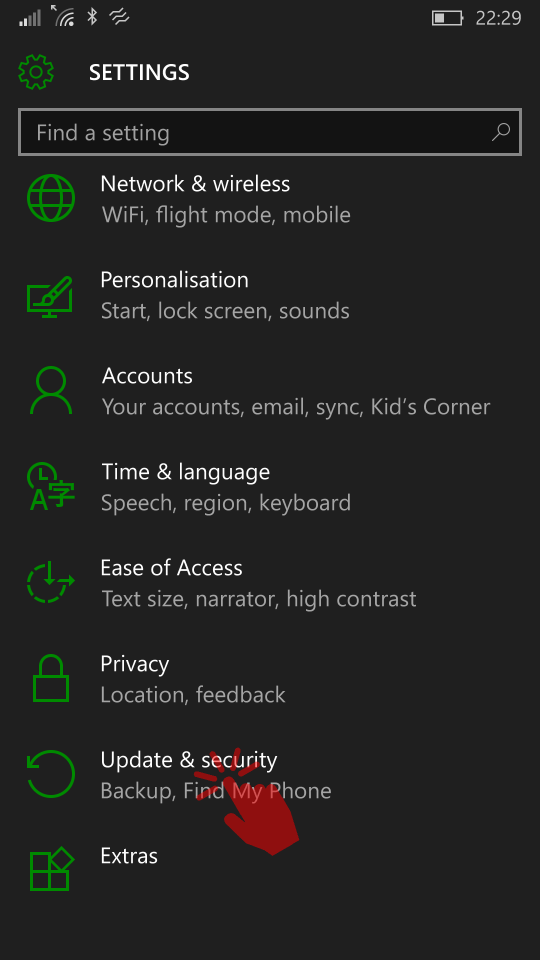
Enabling Developer Mode Phone
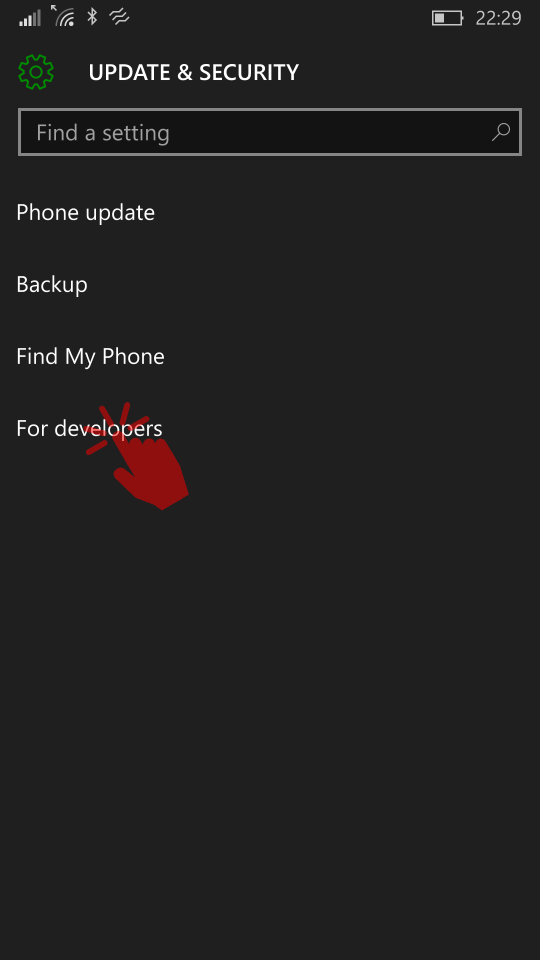
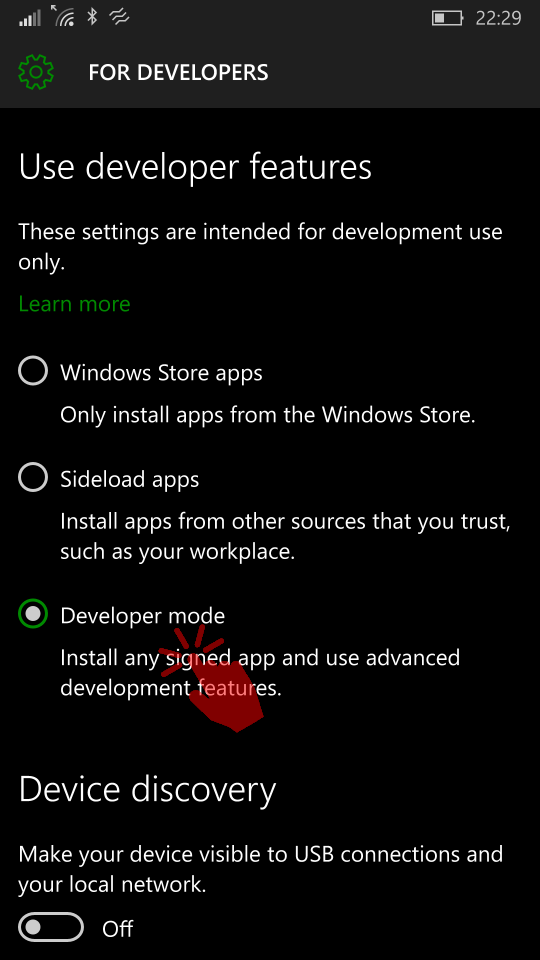
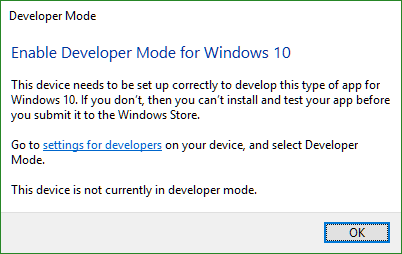
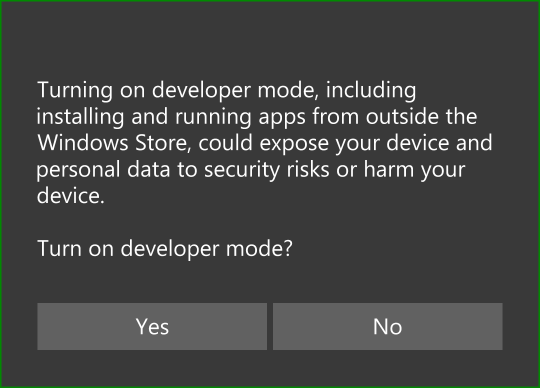
When you choose Developer mode you will get a pop-up like this:
Back to Visual Studio
- Choose Device in the run/debug dropdown
- Choose ARM processor architecture
- Plug in your phone using a USB cable

Now try running the app (click the green play button or press F5) and you'll get a white screen with tiny numbers on the right hand side. If your device is PIN-protected, make sure you enter the PIN before deploying, otherwise it will fail.
This is pretty amazing. We haven't written any code yet, but we've already got something running on the phone.
NOTE: If you want the whole app to use a dark theme (generally white text on a black background, instead of black text on a white background), then double-click on
App.xamland change it soRequestedTheme="Dark", like this:
<Application
    x:Class="TomSSLBand.App"
    xmlns="http://schemas.microsoft.com/winfx/2006/xaml/presentation"
    xmlns:x="http://schemas.microsoft.com/winfx/2006/xaml"
    xmlns:local="using:TomSSLBand"
    RequestedTheme="Dark">

</Application>
Unlocking capabilities
Capabilities must be declared in your Universal Windows Platform (UWP) app's package manifest to access certain API or resources like pictures, music, or devices like the camera or the microphone.
So says the official MSDN documentation which you should read if you're writing a Universal Windows App. There are some more useful resources listed later, too.
When a customer downloads your app from the Windows Store, they are notified of all of the capabilities you have declared, so it's important to make sure you don't ask for any you don't need.
Double click on Package.appxmanifest and check Bluetooth and Proximity[5] and click save.
Now open MainPage.xaml, add a textbox or something and run it again.
It's pretty easy, isn't it?
Now you're ready to interact with your Band.
Adding the Microsoft Band SDK
- Add the
Microsoft.Band 1.3.20115NuGet package (click the link for installation instructions)
Microsoft Band Sensors
Here is a list of all of the sensors available to your application.
| Sensor Stream | Details | Frequency |
|---|---|---|
| Accelerometer | Provides X, Y, and Z acceleration in g units. 1 g = 9.81 meters per second squared (m/s2). | 62/31/8 Hz |
| Gyroscope | Provides X, Y, and Z angular velocity in degrees per second (°/sec) units. | 62/31/8 Hz |
| Distance | Provides the total distance in centimeters, current speed in centimeters per second (cm/s), current pace in milliseconds per meter (ms/m), and the current pedometer mode (such as walking or running). | 1 Hz |
| Heart Rate | Provides the number of beats per minute; also indicates if the heart rate sensor is fully locked on to the wearer’s heart rate. The data returned should be used only in resting mode. The SDK doesn’t provide access to the heart rate values optimized for any other activity. | 1 Hz |
| Pedometer | Provides the total number of steps the wearer has taken since the Band was last factory-reset. This is a lifetime counter and not a daily or a 0-based counter. To determine the absolute number of steps between two readings, you must take the difference between the returned values. | Value change |
| Skin Temperature | Provides the current skin temperature of the wearer in degrees Celsius. | 1 Hz |
| UV | Provides the current ultraviolet radiation exposure intensity | 1 Hz |
| Band Contact | Provides the current state of the Band as being worn/not worn. | Value change |
| Calories | Provides the total number of calories the wearer has burned since the Band was last factory-reset. This is a lifetime counter and not a daily or a 0-based counter. To determine the absolute number of calories burned between two readings, you must take the difference between the returned values. | Value change |
| Galvanic Skin Response | (Microsoft Band 2 only) Provides the current skin resistance of the wearer in kohms | Every 5 secs |
| RR Interval | (Microsoft Band 2 only) Provides the interval in seconds between the last two continuous heart beats. The data returned should be used only in resting mode. The SDK doesn’t provide access to the RR interval values optimized for any other activity. | Value change |
| Ambient Light | (Microsoft Band 2 only) Provides the current light intensity (illuminance) in lux (lumens per sq. meter). | 2 Hz |
| Barometer | (Microsoft Band 2 only) Provides the current raw air pressure in hPa (hectopascals) and raw temperature in degrees Celsius. | 1 Hz |
| Altimeter | (Microsoft Band 2 only) Provides current elevation data like total gain/loss, steps ascended/descended, flights ascended/descended, and elevation rate. | 1 Hz |
Connecting to the Microsoft Band
The way it works is that you search for paired bands, then connect to a band by creating a band client. The band client has a sensor manager and that manages subscriptions to the different sensors. Two of the sensors require explicit user consent to have their data accessed, but once this consent is granted for an application, it is remembered until it is revoked or the application is uninstalled from the device (meaning that you won't need to grant permission again each time you deploy your app during this tutorial). Having said that, I experienced a few problems with revocation of access, so when I wanted to demonstrate the granting of consent, I uninstalled the application first and then reinstalled it.
If consent has not been granted, the application cannot access the sensor. It's not an optional rule that an unscrupulous developer can elect to bypass.
At the time of writing, only the heart rate and RR interval sensor subscriptions require explicit user consent.
Revoking permissions
Go to Settings → Privacy → Other Devices → MSFT Band 2 nn:nn → Let these apps use my MSFT Band 2 nn:nn and slide it to No
Strangely this didn't seem to work for me, so I just uninstalled the app from my phone and the next time I installed it (by choosing deploy to device in Visual Studio), I had to grant the permissions again.
Show me the code
Go back to your empty app in Visual Studio and navigate to MainPage.xaml. This is the layout file for the page and we just want to add a few placeholders so that we can display the data from the various sensors. Since I was in a rush, I just came up with a very basic design:
<Page
x:Class="TomSSLBand.MainPage"
xmlns="http://schemas.microsoft.com/winfx/2006/xaml/presentation"
xmlns:x="http://schemas.microsoft.com/winfx/2006/xaml"
xmlns:local="using:TomSSLBand"
xmlns:d="http://schemas.microsoft.com/expression/blend/2008"
xmlns:mc="http://schemas.openxmlformats.org/markup-compatibility/2006"
mc:Ignorable="d">
<!--Don't change the bit above. Change the bit below.-->
<Grid Background="{ThemeResource ApplicationPageBackgroundThemeBrush}">
<Grid.Resources>
<Style TargetType="TextBlock" BasedOn="{StaticResource HeaderTextBlockStyle}">
<Setter Property="HorizontalAlignment" Value="Center" />
<Setter Property="VerticalAlignment" Value="Center" />
<Setter Property="FontWeight" Value="Bold" />
</Style>
</Grid.Resources>
<Grid.RowDefinitions>
<RowDefinition Height="Auto"></RowDefinition>
<RowDefinition></RowDefinition>
<RowDefinition></RowDefinition>
<RowDefinition></RowDefinition>
<RowDefinition></RowDefinition>
<RowDefinition></RowDefinition>
<RowDefinition></RowDefinition>
</Grid.RowDefinitions>
<TextBlock HorizontalAlignment="Center">Tom SSL Band</TextBlock>
<StackPanel Grid.Row="1" Orientation="Horizontal" HorizontalAlignment="Center">
<TextBlock x:Name="Sensor1Id" Margin="0,0,5,0" Foreground="Red" >♥</TextBlock>
<TextBlock x:Name="Sensor1Display">---</TextBlock>
</StackPanel>
<StackPanel Grid.Row="2" Orientation="Horizontal" HorizontalAlignment="Center">
<TextBlock x:Name="Sensor2Id" Margin="0,0,5,0" ></TextBlock>
<TextBlock x:Name="Sensor2Display">---</TextBlock>
</StackPanel>
<StackPanel Grid.Row="3" Orientation="Horizontal" HorizontalAlignment="Center">
<TextBlock x:Name="Sensor3Id" Margin="0,0,5,0" ></TextBlock>
<TextBlock x:Name="Sensor3Display">---</TextBlock>
</StackPanel>
<StackPanel Grid.Row="4" Orientation="Horizontal" HorizontalAlignment="Center">
<TextBlock x:Name="Sensor4Id" Margin="0,0,5,0" ></TextBlock>
<TextBlock x:Name="Sensor4Display">---</TextBlock>
</StackPanel>
<StackPanel Grid.Row="5" Orientation="Horizontal" HorizontalAlignment="Center">
<TextBlock x:Name="Sensor5Id" Margin="0,0,5,0" ></TextBlock>
<TextBlock x:Name="Sensor5Display">---</TextBlock>
</StackPanel>
<StackPanel Grid.Row="6" Orientation="Horizontal" HorizontalAlignment="Center">
<TextBlock x:Name="Sensor6Id" Margin="0,0,5,0" ></TextBlock>
<TextBlock x:Name="Sensor6Display">---</TextBlock>
</StackPanel>
</Grid>
</Page>
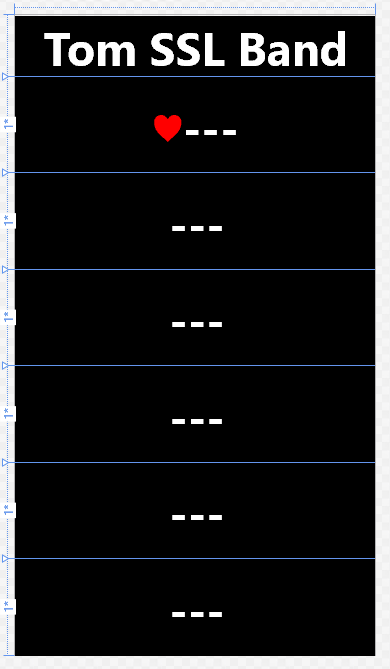
That gives you something like this (if it shows as black on white in the designer even though you have set the dark theme in the App.xaml page you can fix this by reloading the designer view, but you needn't worry, it will still be white on black when you run the app):
Now navigate to the code-behind page, MainPage.xaml.cs.
Modify the constructor as shown:
public MainPage()
{
    this.InitializeComponent();
    Loaded += OnLoaded;
}
As you type the += Visual Studio will offer to create the method and wire it up if you press Tab. Let it and then rename if you want to (like I have done here).
Add these fields to the top of the class:
public sealed partial class MainPage : Page
{
    IBandInfo[] pairedBands;
    IBandClient bandClient;
    bool active; // We are taking readings.
    bool busy; // App is busy wiring things up.

    //...
Asynchrony abounds
Pretty much everything in Universal Windows Platform (UWP) apps is asynchronous, for fairly obvious reasons (we don't want to lock up the device). Lots of
asyncandawait.
Getting the bands which are paired to the device is very easy.
this.pairedBands = await BandClientManager.Instance.GetBandsAsync();
And connecting to your chosen band is similarly straightforward:
this.bandClient = await BandClientManager.Instance.ConnectAsync(pairedBands[0]);
The code for taking readings from many of the sensors can also be quite brief, with the heart rate and RR sensors needing the addition of a short consent check.
For example:
private async void GetHeartRateInfo(IBandClient bandClient)
{
    // Check if the current user has given consent to the collection of heart rate sensor data.
    if (bandClient.SensorManager.HeartRate.GetCurrentUserConsent() !=
            UserConsent.Granted)
    {
        // We don't have user consent, so let's request it.
        await bandClient.SensorManager.HeartRate.RequestUserConsentAsync();
    }

    // Hook up to the heart rate sensor ReadingChanged event
    bandClient.SensorManager.HeartRate.ReadingChanged += async (sender, args) =>
    {
        // Update the screen when the reading changes
        await Dispatcher.RunAsync(Windows.UI.Core.CoreDispatcherPriority.Normal, () =>
        {
            SensorDisplay.Text = string.Format("{0} ({1})", args.SensorReading.HeartRate, args.SensorReading.Quality);
        });
    };

    // Start reading from the heart rate sensor
    try
    {
        await bandClient.SensorManager.HeartRate.StartReadingsAsync();
    }
    catch (BandException ex)
    {
        // handle a Band connection exception
    }
}
If you looked at the table of Band sensors, you will have noticed that there was a frequency column. In most cases, this means that you can choose the frequency with which you take readings.
With this in mind, you could modify the code above a bit like this. Each sensor has a default repoting interval, so you can omit this code completely (as I have done in the sample app - there wasn't time):
// Get a list of available reporting intervals
IEnumerable<TimeSpan> supportedHeartBeatReportingIntervals = bandClient.SensorManager.HeartRate.SupportedReportingIntervals;
foreach (var ri in supportedHeartBeatReportingIntervals)
{
    // Do something with the intervals, e.g. add them to a drop down or similar.
}

// This code just chooses the first available value to illustrate the point.
bandClient.SensorManager.HeartRate.ReportingInterval = supportedHeartBeatReportingIntervals.First();
Since each sensor implements the IBandSensor interface, I thought I might be able to save a bit of effort. However, since each sensor has very specific names for the readings that can be obtained, there isn't really a common interface for extracting the data. In other words I can't just say something like ((IBandSensor)sensor).GetValueForDisplay as no such functionality exists. There are various ways to get round this problem and it's the sort of situation where you might want to do a switch on a type, but that's not possible in C#. Again, there are various ways around that, too.
I decided to build a dictionary of the interfaces implemented by the sensors which returned a Func<IBandSensorReading, string>> which I could then Invoke to extract the readings I wanted.
Dictionary<Type, Func<IBandSensorReading, string>> FormatSensorReading = new Dictionary<Type, Func<IBandSensorReading, string>>
{
    {typeof(IBandAccelerometerReading), bsr => string.Format("{0} - {1} - {2}", Math.Round(((IBandAccelerometerReading)bsr).AccelerationX, 2), Math.Round(((IBandAccelerometerReading)bsr).AccelerationY, 2), Math.Round(((IBandAccelerometerReading)bsr).AccelerationZ, 2))},
    {typeof(IBandAltimeterReading), bsr => string.Format("{0} - {1}", ((IBandAltimeterReading)bsr).FlightsAscended, ((IBandAltimeterReading)bsr).FlightsDescended)},
    {typeof(IBandBarometerReading), bsr => string.Format("{0} - {1}", Math.Round(((IBandBarometerReading)bsr).Temperature, 2), Math.Round(((IBandBarometerReading)bsr).AirPressure, 2))},
    {typeof(IBandHeartRateReading), bsr => string.Format("{0} ({1})", ((IBandHeartRateReading)bsr).HeartRate, ((IBandHeartRateReading)bsr).Quality)},
    {typeof(IBandAmbientLightReading), bsr => string.Format("{0} lux", ((IBandAmbientLightReading)bsr).Brightness) },
    {typeof(IBandGsrReading), bsr => string.Format("{0}", ((IBandGsrReading)bsr).Resistance) },
    {typeof(IBandSkinTemperatureReading), bsr => string.Format("{0}", Math.Round(((IBandSkinTemperatureReading)bsr).Temperature, 2)) }
};
This meant I could create a method to subscribe to each sensor and return the data formatted for display. Notice the important line of code where it does the actual formatting by invoking the Func stored in the dictionary.
private async void GetSensorInfo<T>(IBandSensor<T> sensor, TextBlock textBlock) where T : IBandSensorReading
{
    sensor.ReadingChanged += async (sender, args) =>
    {
        await Dispatcher.RunAsync(Windows.UI.Core.CoreDispatcherPriority.Normal, () =>
        {
            // This next line of code is the important one mentioned above.
            textBlock.Text = FormatSensorReading[typeof(T)].Invoke(args.SensorReading);
        });
    };
    try
    {
        await sensor.StartReadingsAsync();
    }
    catch (BandException ex)
    {
        textBlock.Text = "It went wrong!";
    }
}
Sending Haptic Feedback
If you want to make the band vibrate, that's also very straightforward. You just need to do something like this (you should add error handling):
await bandClient.NotificationManager.VibrateAsync(VibrationType.NotificationAlarm);
The haptic feedback has been integrated into the application in the Github repo. Download it and take a look. It's very simple.
Useful Resources
Before you write your own app, you should go to the Microsoft Health Developers website and choose Band SDK. You should also read the SDK documentation. And there are quite a few UWP samples in Microsoft's Universal Samples GitHub repo too, although not for the Band.
Optionally, you could go to the dev center [sic] (I'm English, it's American) at https://dev.windows.com/en-us/overview, sign up for an individual developer account (which will cost you about £12 + VAT for a twelve month license) and create a new app. This enables you to reserve a name for your application for up to twelve months, after which time the name will become available for registration again if you haven't yet uploaded your app.
Further work
There's a lot more you can do. It's possible to add tiles to your band, to send notifications. It's all in the SDK documentation.
It might be nice to integrate with Cortana. However, it's worth bearing in mind that it's not possible to use the microphone on the Band for this purpose, so you have to use Cortana on the host device. In other words you might come up with commands like, "TomSSL Band, what is my current heart rate?" which could launch the application and just take a pulse reading. Or you might be a bit more imaginative and create something like, "When am I next going to be in London, TomSSL tasks?" I'm sure you get the idea.
Read more about Cortana integration here and check out the sample code from Microsoft at https://github.com/Microsoft/Windows-universal-samples/tree/master/Samples/CortanaVoiceCommand.
Any of these would be a logical next step and they are only beyond the scope of this article due to the tight time constraints I imposed on myself.
Conclusion
The Microsoft Band (and, in particular, the newer Microsoft Band 2) is possibly the most feature-packed and reasonably priced wearable smart watch on the market. What's more, it's very easy to write applications that interact with it. In this article we saw how easy it is to write a very basic app which interacts with the band, reading and displaying its sensor data and making it vibrate. The code is available in Github.
Please remember that this code was written during a live demo. It's not production quality code and merely serves to illustrate how easy it can be to write an application targeting the Microsoft Band.
Having said that, you should be able to download it and deploy it to your device.
In future posts we'll be looking at adding Cortana voice commands and also writing a cross-platform application using Xamarin.
Let me know what you think in the comments below.
Not constantly. I remove it occasionally to charge it up. ↩︎
I didn't even know that the SDK is, in fact, a small NuGet package. ↩︎
I mean code targeting the Band. As I've written elsewhere, I've been coding for over thirty years. ↩︎
Actually, since we're writing a Windows Universal App, it only needs to be a Windows 10 device. But it's more fun if it's a phone and it's more likely to be connected to your Band already. ↩︎
All the documentation I could find online suggested that I needed the Proximity capability, despite the fact that my app seemed to work okay without it. But I am probably missing something important.
↩︎