Once I had decided that I was going to host my new Ghost blog myself, I thought that it would be cool if I could host it in Microsoft Azure. I had various other options available to me, including Shared and VPS accounts with Arvixe [*][1] that I've already paid for and use for other things, but I was curious to see how straightforward it would be to get it working in Azure. As I mentioned in my introductory post, my only real requirement (other than being able to get it up and running before the end of 2014) was that I should be able to enforce encrypted communication over SSL. It turns out that wasn't quite as easy as I'd hoped, but I got it working in the end (look in the address bar now. Can you see the padlock?) and this is how I did it.
Overview
In this tutorial we are going to setup Ghost in Azure using a free SendGrid account for sending email. We'll sign up for this account from within Azure itself as this gives us a significantly larger quota of free emails (25,000 per month instead of 12,000). We'll use a custom domain name of https://ghost-demo.tomssl.com and we'll enforce the use of SSL for all traffic using a custom certificate. To achieve this we need to edit three files and, rather than changing them locally and then deploying them, we're going to live dangerously and edit them online using Visual Studio Online "Monaco", which is part of Azure. I would never advocate doing this except in exceptional circumstances, but it's quite interesting and so I present the method here.
SSL Certificates
If you want to obtain a completely free trusted Class 1 SSL certificate then I can thoroughly recommend StartSSL. I have Class 2 validation with StartSSL and am a Web of Trust Notary with them which means I can perform identity validation. My identity card is here.
Before we start I should mention that custom domains and SSL certificates are not available in the Free edition of Azure Websites. Indeed, since installing SSL certificates costs extra on the Basic Tier, you are probably better off using the Standard Tier if you want custom domains and custom SSL certificates. Check out the pricing information and decide for yourself.
I should also mention that going over all of the things Azure has to offer is way beyond the scope of this article, although even if you've never used Azure before there should be enough information here to get you started. But this is emphatically not a general tutorial on Azure. If you want one of those, this one from Microsoft might be a good place to start.
Azure Administration
There are two main ways to administer your Azure account through the web using a browser: the standard Azure Management Portal at https://manage.windowsazure.com and the new Azure Preview Portal at https://portal.azure.com.
It's also possible to administer Azure using PowerShell, but we're not going to do that here.
The new portal is great and you should use it where possible. Read more about it here. Having said that, right now (5th January 2015) not everything from the old portal is available in the new portal. SendGrid is one of those things.
Creating a free SendGrid account
Okay, let's get started. First create a free SendGrid account from within the Azure Marketplace in the old Azure Management Portal. Of all the free bulk email sending accounts I've seen, the offering from SendGrid within Azure seems by far the most generous with 25,000 free emails a month, which is just over double the standard 400/day offering from the SendGrid website.
Click NEW -> MARKETPLACE (PREVIEW) and scroll through until you find SendGrid. Choose the free option.
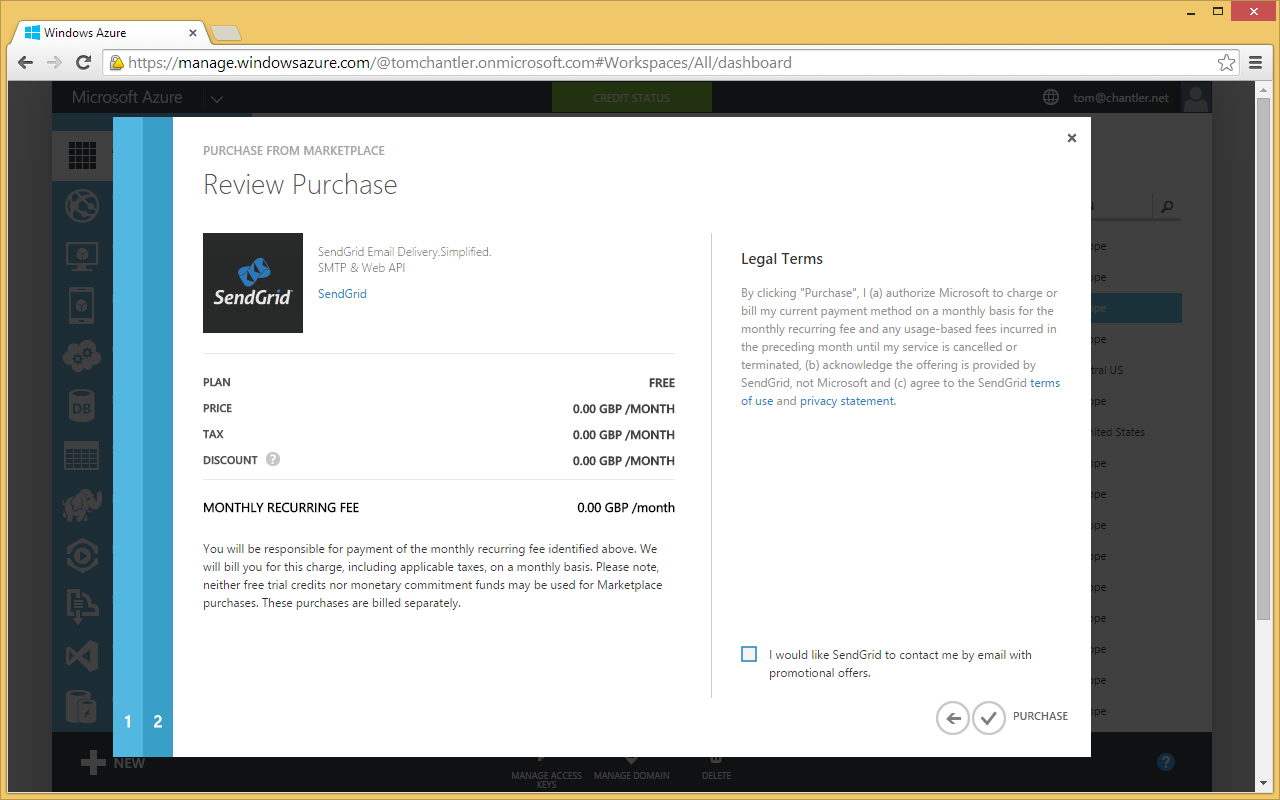
Once you've done that select your new SendGrid account and grab the credentials by clicking on the CONNECTION INFO button at the bottom of the screen. You only need the username and password.
Installing Ghost
Now go to the Preview Portal (we're going to stay in here from now on) and click on the green plus at the bottom of the screen and select Everything and search for ghost, like this:
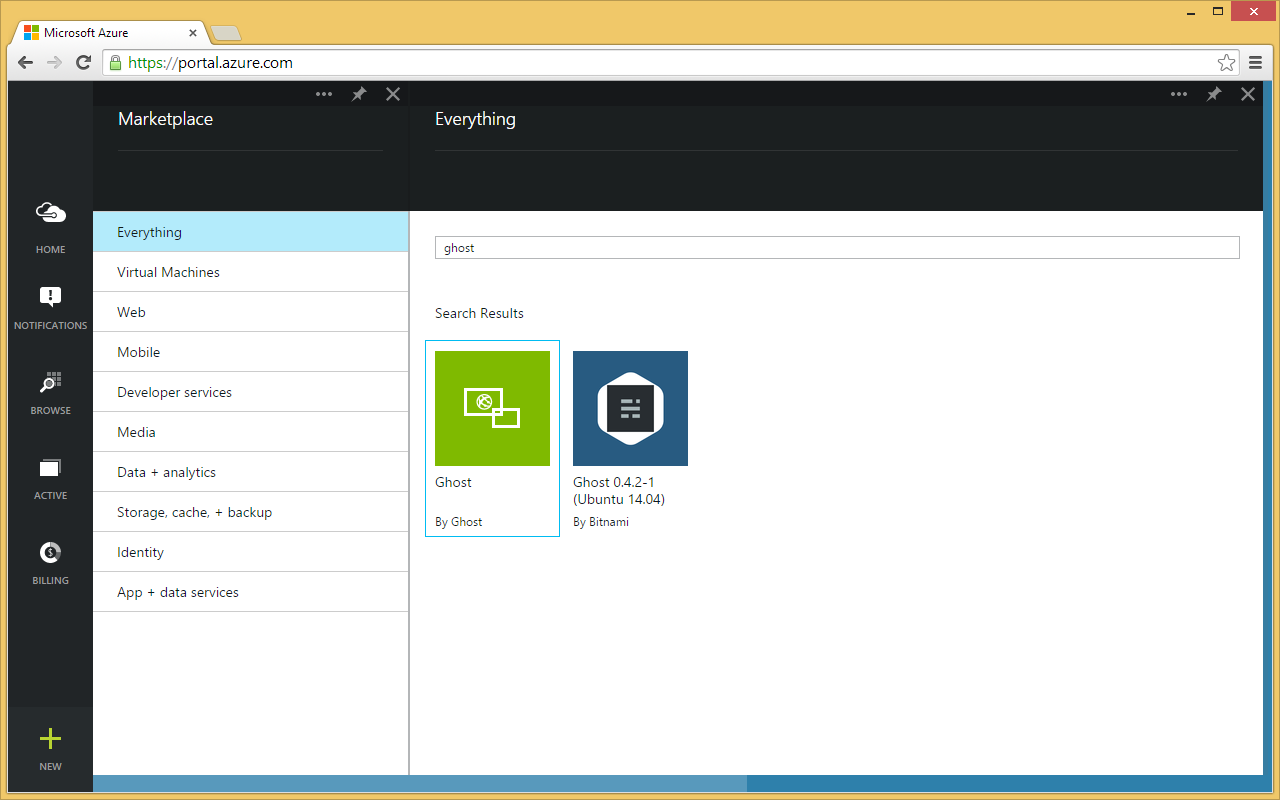
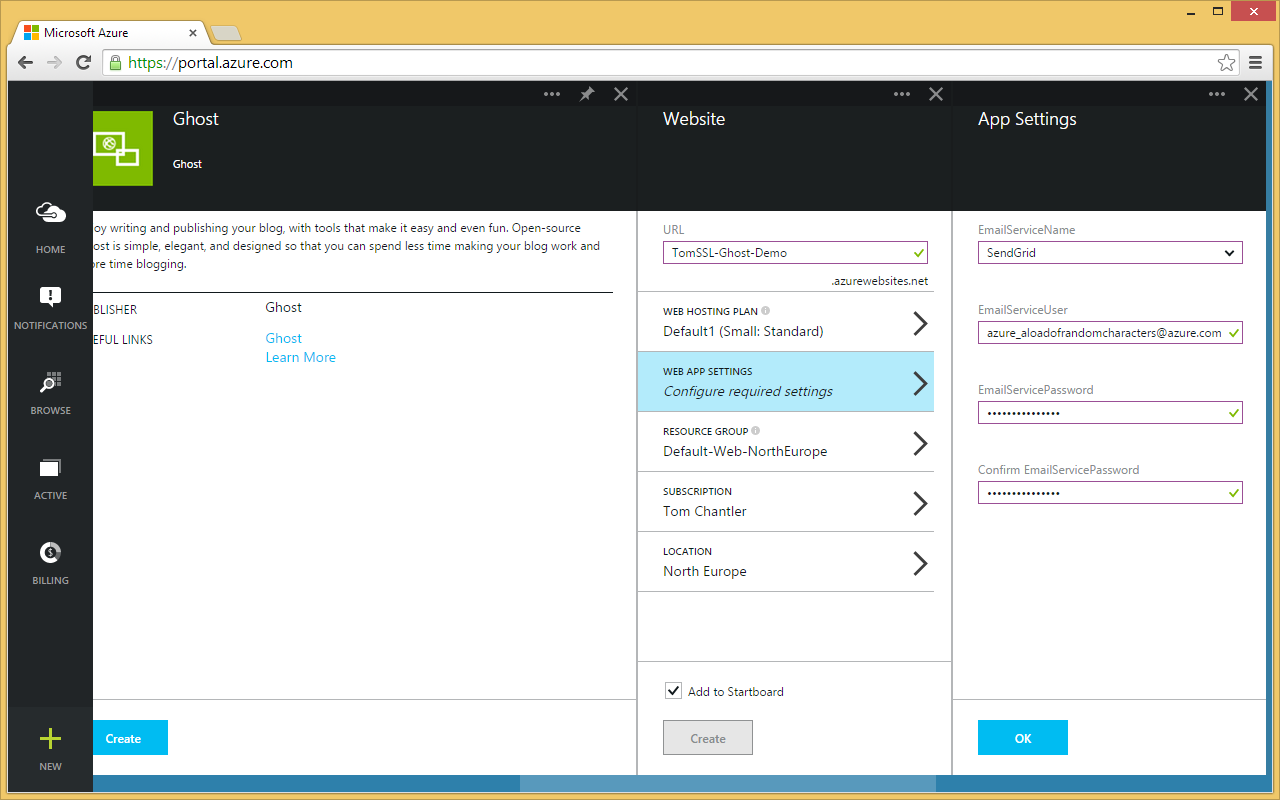
Choose Ghost by Ghost and click Create. Choose a URL and enter your SendGrid credentials into the WEB APP SETTINGS, like this and then click OK:
Now it will return you to the main portal and do this for a minute or two.
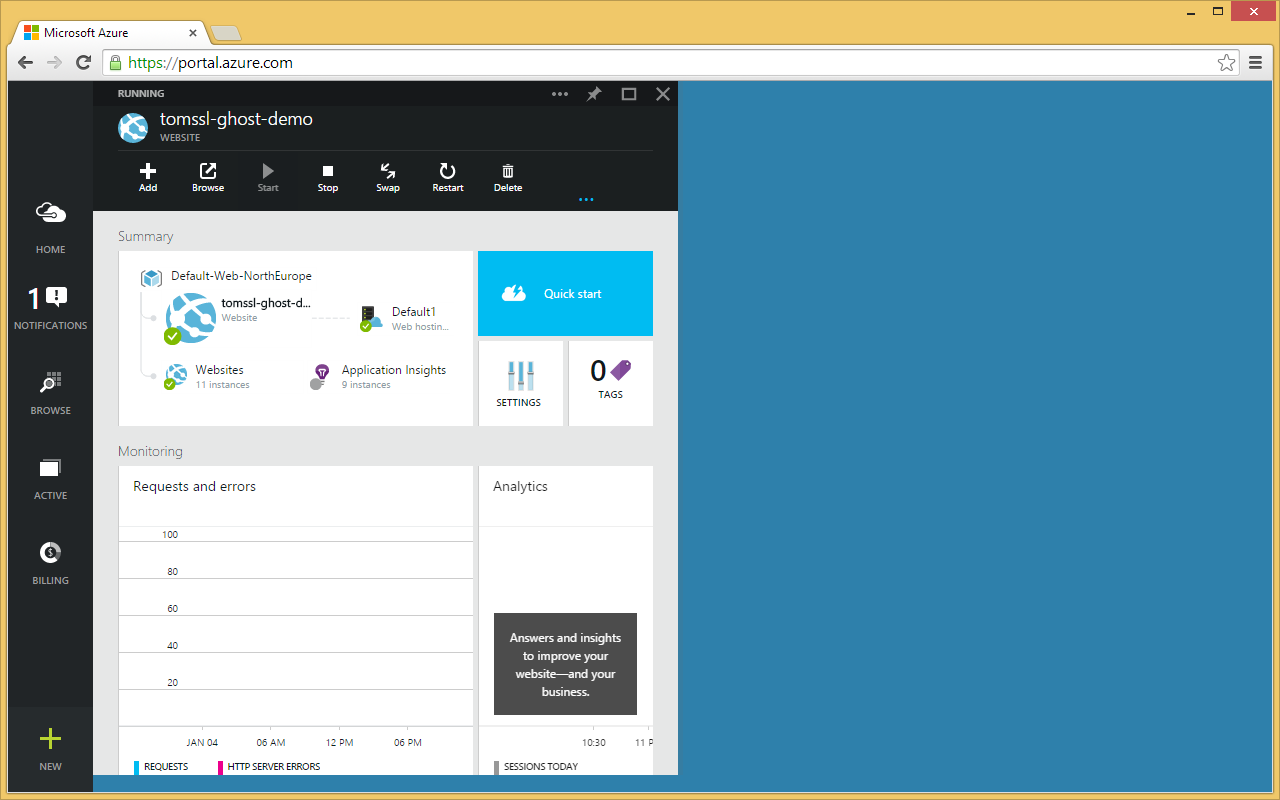
Eventually you will be informed that your new website is up and running and you will be able to browse to it.
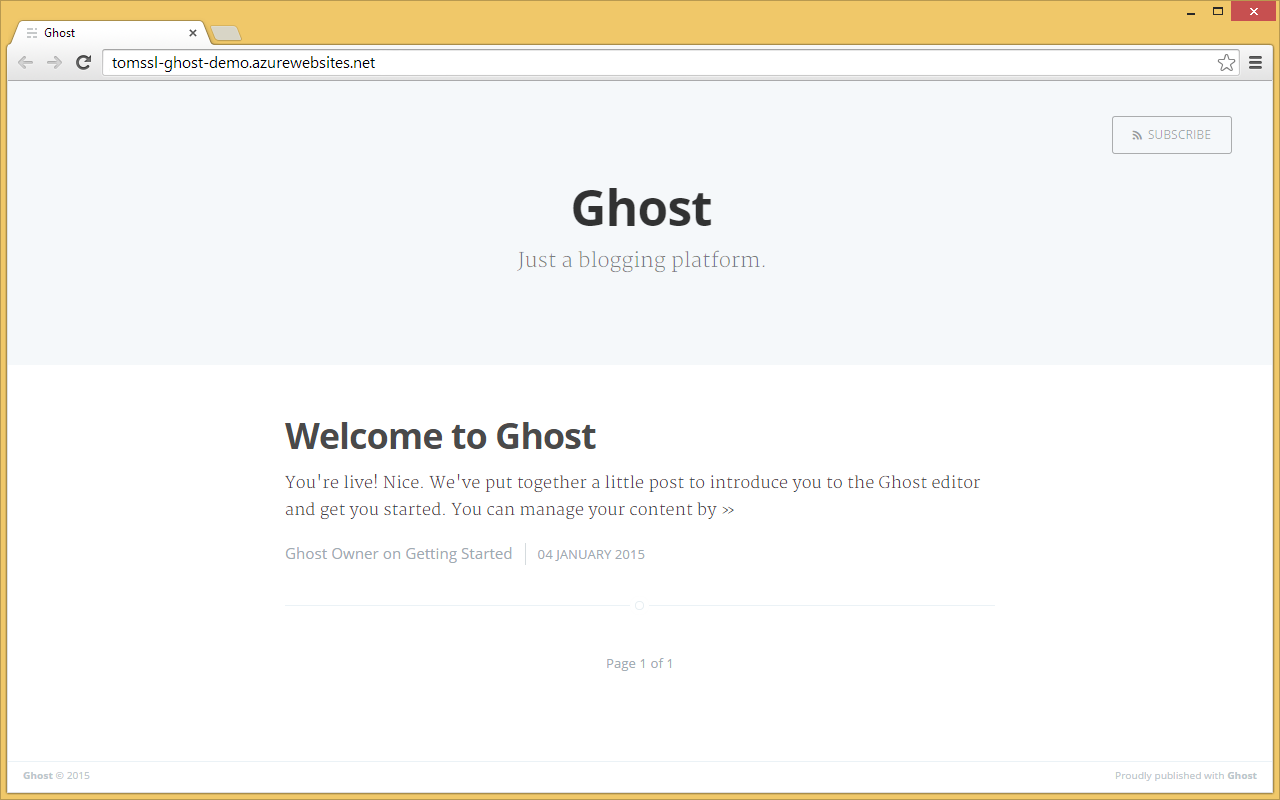
You may need to wait a few minutes or try refreshing a few times whilst everything starts up (remember this is running under node.js inside IIS), but eventually you will see a screen like this.
Using a custom domain and forcing SSL communication
In order to make Ghost work properly with a custom domain and to force communication over SSL you need to do three or four more things:
- Set a custom domain in the Azure portal;
- Add the DNS records;
- Optionally apply your own SSL certificate or just use the wildcard *.azurewebsites.net certificate provided by Microsoft and live with certificate errors;
- Tweak three files from the Ghost installation (more on that later);
Setting a custom domain in the Azure Portal
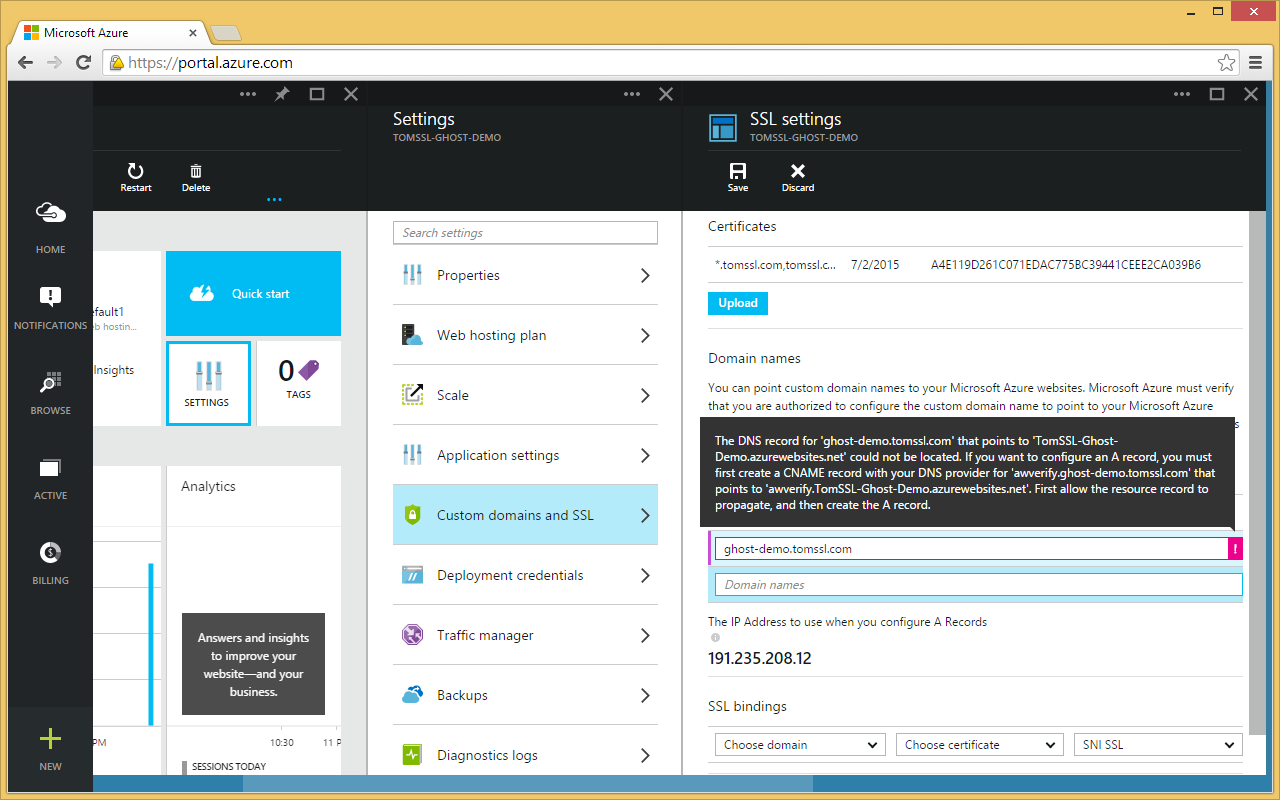
Select your website and then select SETTINGS -> Custom domains and SSL.
When you enter your custom domain Azure tries to validate it immediately which results in a genuinely helpful error message like this:
Setting up the DNS records
I use the free version of CloudFlare for nearly all of my DNS hosting as it has support for some of the more obscure types of DNS record, including SRV and LOC. CloudFlare is primarily meant to be used for web acceleration. As their website says:
A, AAAA and CNAME records can have their traffic routed through the CloudFlare system. Click the cloud next to each record to toggle CloudFlare on or off.
But I often disable that functionality and just use them as a central place to host my DNS records for free.
Create the missing record(s) and you will be rewarded with a green tick and you can click Save. I created these records for the tomssl.com domain (you can see that I have not enabled CloudFlare acceleration):

At this point, if you have an SSL certificate stored as a .pfx file you can upload it and provide the password. Then it will be available in the SSL bindings dropdowns as show below:
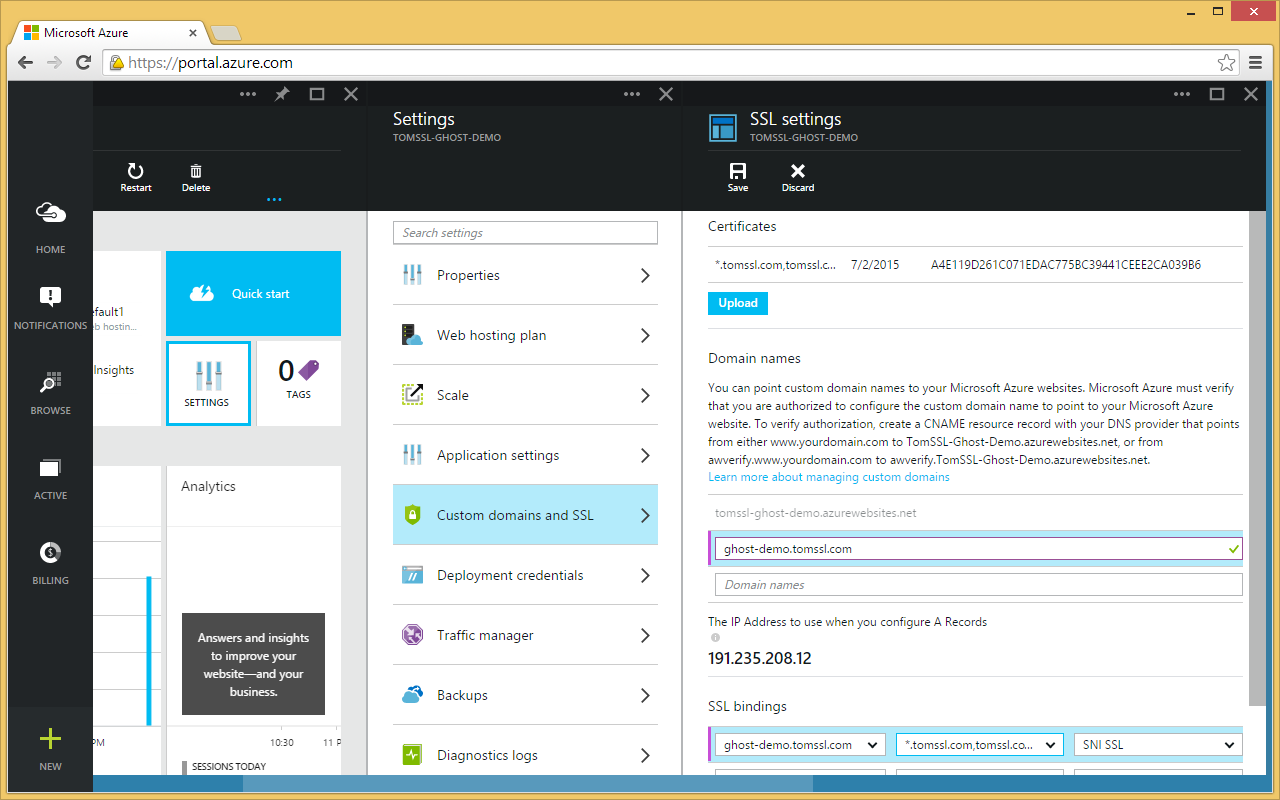
Note: Unless you particularly need to support legacy browsers, you should probably opt for SNI SSL as it is far cheaper than IP based SSL (you can have 5 SNI certificates and 1 IP bound certificate for free in the Standard Tier).
Fixing the Ghost Installation
Now you have sorted out your custom domain and SSL certificate, you need to tell Ghost about them by tweaking those three files I alluded to earlier.
wwwroot\web.config- this is a standard IIS web.config file. It will contain our rewrite rules to enforce SSL and make sure we are using our custom domain.wwwroot\config.js- this file contains your custom domain.wwwroot\core\server\middleware\index.js- This is part of the Ghost installation. I should contact the Ghost team about changing this for Azure.
There are lots of ways you could change these files and the normal procedure would be to edit them offline and then deploy them, but let's throw caution to the wind and edit them online. Please note that this is terrible advice that could cost you your job. Never edit live code like this. Well, maybe just this once since our site is not yet live. Ordinarily you might deploy your changed files using SFTP or by deploying directly from source control. Here is a fairly comprehensive list of ways to deploy to Azure.
Installing Visual Studio Online "Monaco"
Another really cool feature about Azure is Visual Studio Online. This is a free site extension which lets you edit your files online. It's installed by choosing the website and scrolling to the bottom and choosing Extensions like this:
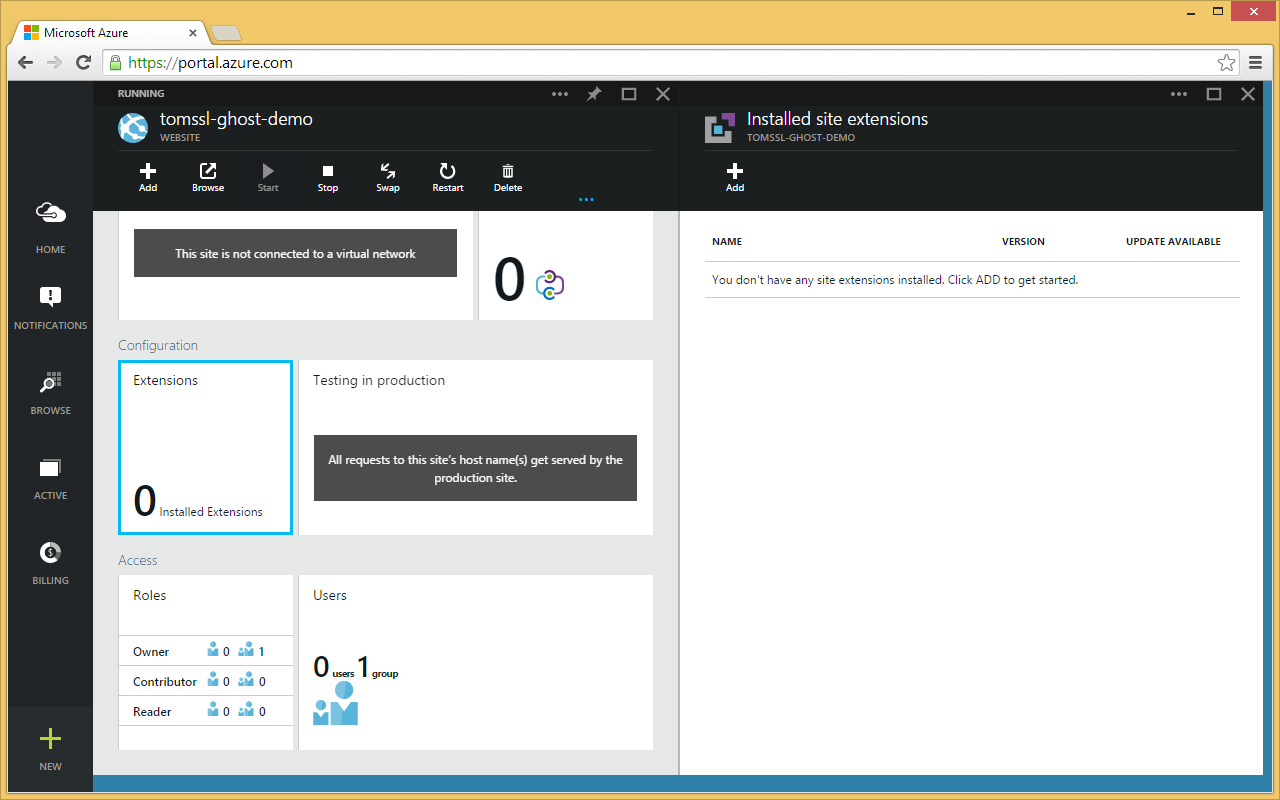
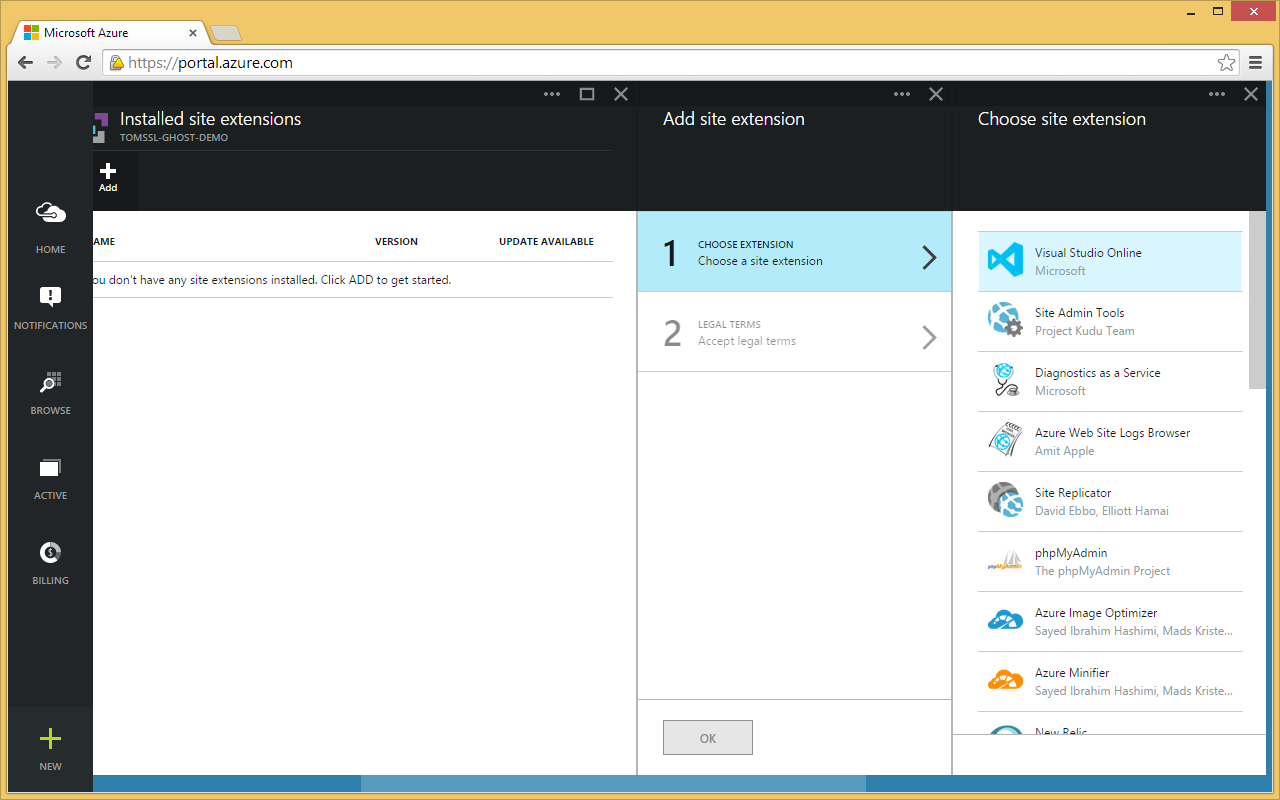
Now Add and choose Visual Studio Online.
Once this has installed it will appear in the Extensions blade (each vertical segment in the portal is called a blade) and you can choose Visual Studio Online and then Browse.
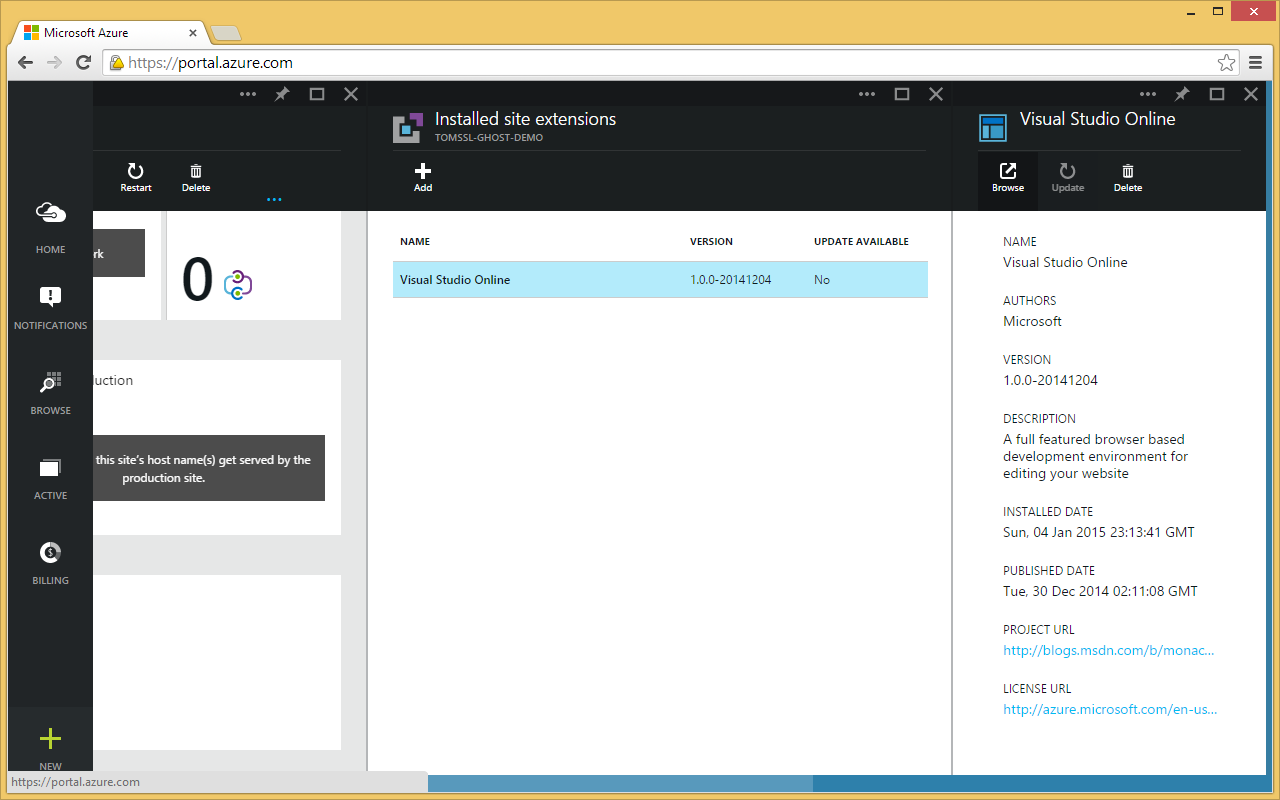
This will open a new window and you will notice that the URL is derived from your website URL, so you can navigate there directly if you like.
e.g. if your website is at http://mywebsite.azurewebsites.net then your Visual Studio Online is at https://mywebsite.scm.azurewebsites.net**/dev** once you have installed the extension.
Editing wwwroot\web.config
Browse to Visual Studio Online and you will see something like this. Click on web.config in the list of files on the left hand side.
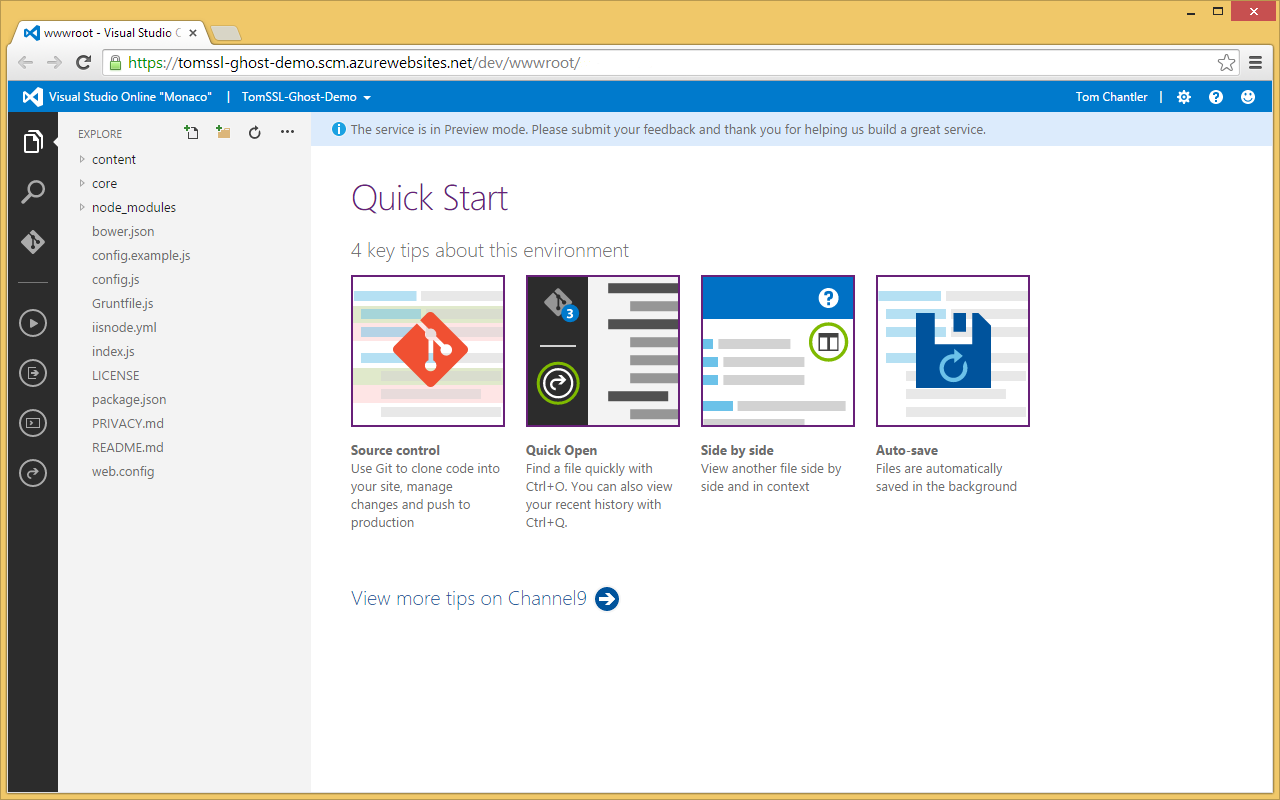
Change the web.config file like this:
<?xml version="1.0" encoding="utf-8"?>
<configuration>
  <system.webServer>
    <httpErrors existingResponse="PassThrough" />
    <handlers>
      <add name="iisnode" path="index.js" verb="*" modules="iisnode"/>
    </handlers>
    <rewrite>
      <rules>
        <rule name="ConvertToLowerCase" stopProcessing="true">
          <match url=".*[A-Z].*" ignoreCase="false" />
          <action type="Redirect" url="{ToLower:{R:0}}" redirectType="Permanent" />
        </rule>
        <rule name="ForceSSL" stopProcessing="true">
          <match url="(.*)" />
          <conditions>
            <add input="{HTTPS}" pattern="^OFF$" />
          </conditions>
          <action type="Redirect" url="https://{HTTP_HOST}/{R:1}" redirectType="Permanent" />
        </rule>
		<rule name="CanonicalHostName" stopProcessing="true">
          <match url="(.*)" />
          <conditions>
            <add input="{HTTP_HOST}" negate="true" pattern="^ghost-demo.tomssl\.com$" />
          </conditions>
          <action type="Redirect" url="https://ghost-demo.tomssl.com/{R:1}" redirectType="Permanent" />
        </rule>
        <!-- These next two rules are related to node.js -->
        <rule name="StaticContent">
          <action type="Rewrite" url="public{REQUEST_URI}"/>
        </rule>
        <rule name="DynamicContent">
          <conditions>
            <add input="{REQUEST_FILENAME}" matchType="IsFile" negate="True"/>
          </conditions>
          <action type="Rewrite" url="index.js"/>
        </rule>
      </rules>
    </rewrite>
  </system.webServer>
</configuration>
We have added a bunch of IIS URL Rewrite rules and tweaked one that was already there.
ConvertToLowerCase- this makes sure the entire url is in lower case.ForceSSL- permanently redirects requests from http to https.CanonicalHostName- makes sure that all requests come in to our custom domain and not via the.azurewebsites.netdomain.
For a great resource explaining URL rewriting in IIS see Ruslan Yakushev's great blog post 10 URL Rewriting Tips and Tricks.
At this point the blog will work but some of the links will be wrong because part of a standard Ghost installation is editing the config.js file to take the custom url.
Editing wwwroot\config.js
Edit the relevant part(s) of config.js with your custom domain. The url you set in here will be used internally by Ghost to create all of the links when the site is rendered. There are sections for development and production settings. Change both. Here is the production section.
    // ### Production
    // When running Ghost in the wild, use the production environment
    // Configure your URL and mail settings here
    production: {
        url: 'https://ghost-demo.tomssl.com', // we have changed this line
        mail: {
            transport: 'SMTP',
            options: {
                service: 'SendGrid',
                auth: {
                    user: '[email protected]',
                    pass: 'secretpassword'
                }
            }
        },
        database: {
            client: 'sqlite3',
            connection: {
                filename: path.join(__dirname, '/content/data/ghost.db')
            },
            debug: false
        },
        server: {
            // Host to be passed to node's `net.Server#listen()`
            host: '127.0.0.1',
            // Port to be passed to node's `net.Server#listen()`, for iisnode set this to `process.env.PORT`
            port: process.env.PORT
        },
        forceAdminSSL: false // causes a redirect-loop on azure, use urlrewrite instead
    },
Now all of the links in your blog will point to something starting with https://ghost-demo.tomssl.com/.
Unfortunately, you will now have broken your installation and none of the pages will load as you will get a redirect loop.
Clearly editing the config.js file broke something. Did you notice the clue that forcing SSL might not be completely straightforward in Azure? Maybe setting https in the config.js file is somehow causing the same issue.
forceAdminSSL: false // causes a redirect-loop on azure, use urlrewrite instead
To fix this I had a quick look through the Ghost source code for anything relating to forceAdminSSL.
Editing wwwroot\core\server\middleware\index.js
Since we are handling all of our SSL redirection in IIS via the web.config file prior to reaching the node.js application, we need to prevent the application from doing any further redirects.
Locate the function isSSLrequired (somewhere around line 166 in index.js). This is definitely the culprit as it examines the url set in config.js for https: as predicted. Let's change the function so that it always returns false.
UPDATE: In later versions of Ghost, this function has moved (e.g. it's in wwwroot\core\server\middleware\check-ssl.js in v0.7.1). Your best bet is to search the middleware source code for isSSLrequired.
function isSSLrequired(isAdmin) {
/* - Prevent redirect loop by handling SSL exclusively in web.config
    var forceSSL = url.parse(config.url).protocol === 'https:' ? true : false,
        forceAdminSSL = (isAdmin && config.forceAdminSSL);
    if (forceSSL || forceAdminSSL) {
        return true;
    }
*/
    return false;
}
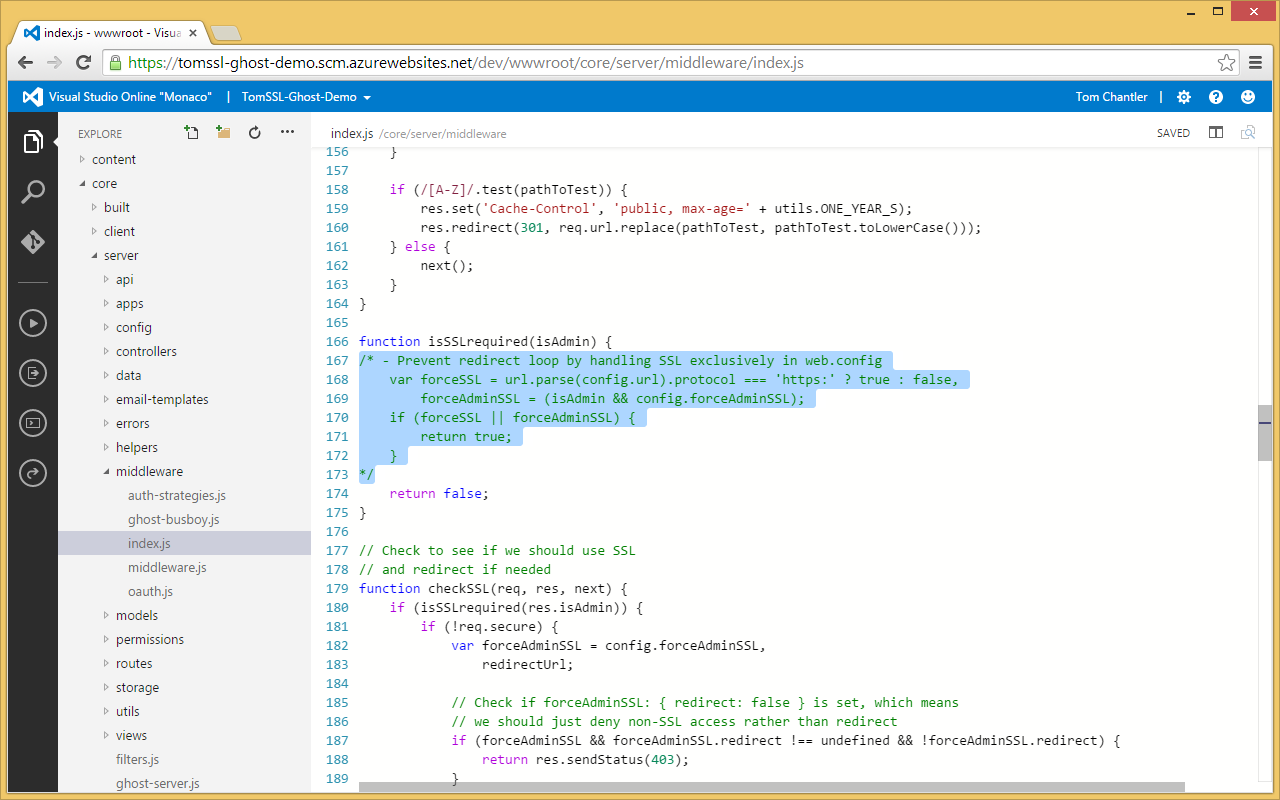
Now we just need to restart the website. We can either restart the whole website or we can just restart node.js.
To restart node.js hit Ctrl-Shift-C to open the console and type npm start and hit enter.
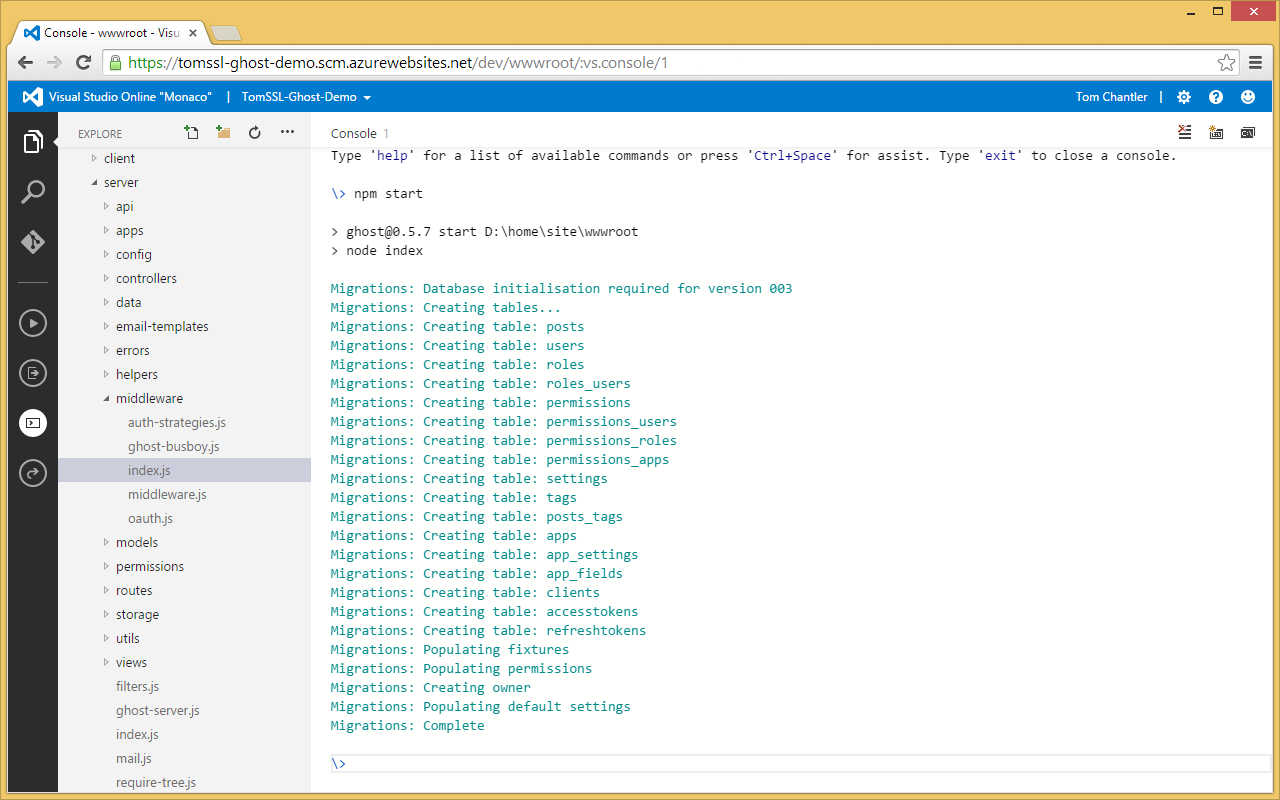
Done. Now your blog will force the use of https everywhere.
Further thoughts
I may write a brief follow-up post explaining how to update to the latest version of Ghost and how to add custom themes. In the mean time, here are some hints.
- Grab the latest version of Ghost. Merge your code changes.
- Update using Felix Rieseberg's open source Ghost Updater.
- Choose a theme and customise it with Code syntax highlighting and add Disqus comments.
- Upload your theme. Can now choose it in drop down.
Conclusion
Azure Websites (sometimes formerly referred to as WAWS) is incredibly powerful and a great place to host a Ghost blog. If you want to force a secure, encrypted HTTPS connection - and according to just about everybody, including Google who have given it a search ranking boost since last August, you should - then there is a little bit of work to do. But as you can see, it's quite straightforward and you only really need to make a couple of very simple changes to three files. And yes, the irony of that Google blog post not being available over https has not eluded me.
In the interest of transparency, if you see a link with an asterisk in square brackets after it like this Arvixe [*] then it's an affiliate link. If you click it and then buy something I might make a tiny amount of money. But you'll always know in advance thanks to the [*]. ↩︎


