

Summary
In this article, we'll get up and running with the Azure CLI (command-line interface) running in a Linux container in Docker. It just so happens that this will be running on my Windows laptop, but it could equally well be running on a Mac or a Linux box (or anything else running Docker). Indeed, somewhat ironically (as you will see shortly), I found that the only way I could get the interactive feature to work properly on my Windows machine was to run it in Docker.
We'll login to our Azure account, do some other really simple things and then see how we can learn to do almost anything else. And I'll warn you about a few issues you might encounter along the way. I'm going to write more about the Azure CLI soon; this is just to get you up and running so that I don't have to include this stuff in any subsequent articles (see the DRY principle of software engineering[1]).
As you may know, I quite like PowerShell, so it's highly likely that other articles will use PowerShell rather than Bash.
If you want to play along and you're running Windows but have not yet installed Docker, then read my article here (and the linked companion article here, if you have any issues sharing your C drive).
Background
I've been using the Azure CLI a lot recently and I really like it. However, since I've experienced one or two slightly annoying issues, it makes sense for me to document them here in the hopes of saving you (and future me, when I have forgotten this) a bit of effort.
Install and run the Azure CLI container
To get up and running, simply run the following command (in my case, I ran it in a PowerShell window):
docker run -it mcr.microsoft.com/azure-cli
If it doesn't work and you get an error like this:

PS C:\dev\TomSSL> docker run -it mcr.microsoft.com/azure-cli
C:\Program Files\Docker\Docker\Resources\bin\docker.exe: error during connect: Post http://%2F%2F.%2Fpipe%2Fdocker_engine/v1.39/containers/create: open //./pipe/docker_engine: The system cannot find the file specified. In the default daemon configuration on Windows, the docker client must be run elevated to connect. This error may also indicate that the docker daemon is not running.
See 'C:\Program Files\Docker\Docker\Resources\bin\docker.exe run --help'.
PS C:\dev\TomSSL>
then exit Docker Desktop and Run as Administrator
Here's an animated gif showing what happens the first time you successfully run the Azure CLI in docker.
Logging in to the Azure CLI
Once you are up and running, you need to login to your Azure account, like this:
az login
If you're running in Docker (which you are), you have manually to open a browser and login by pasting a code, like this:
To sign in, use a web browser to open the page https://microsoft.com/devicelogin and enter the code D5WCKMYJC to authenticate.
Here's that link again, so you can click it here (it'll open in a new tab) and save yourself from typing it in: https://microsoft.com/devicelogin
If you're running in PowerShell, it will open your browser for you and use single sign-on, which is a lot nicer.

When you have logged in, you will see some json with some basic details about your account (subscription) and the currently logged in user.
If you have access to several subscriptions, you can always run
az account showto see which one is currently selected. And runningaz account set -s "Subscription Name"will let you switch subscriptions.
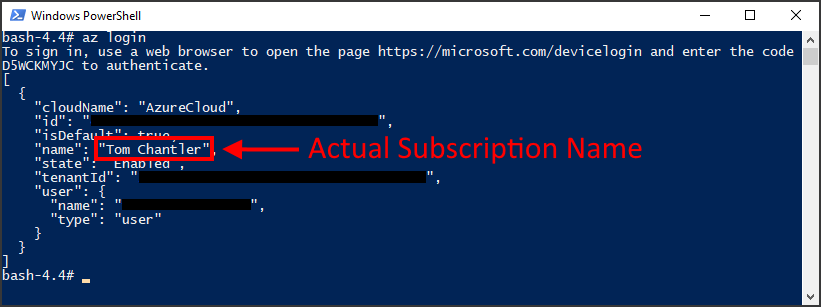
Note: The bit that says
"name": "Tom Chantler"really does mean that my Azure Subscription is called Tom Chantler. That's probably quite daft and is definitely quite confusing.
Context-sensitive help
When running the Azure CLI, you can append -h to any command to get context-sensitive help for that command. Note that you really can append -h at any point; running az account -h or az account set -h will give different outputs. You can literally drill your way in through the commands by appending -h, then refining the command and appending -h again. For example, here's the output from az account -h.

Of course, you could just refer to the documentation at https://docs.microsoft.com/en-us/cli/azure/reference-index?view=azure-cli-latest, but where's the fun in that?
Formatting the output
Whilst you're looking at your account, try running az account show -h which will show you some useful global arguments:
Global Arguments
    --debug           : Increase logging verbosity to show all debug logs.
    --help -h         : Show this help message and exit.
    --output -o       : Output format.  Allowed values: json, jsonc, none, table, tsv, yaml.
                        Default: json.
    --query           : JMESPath query string. See http://jmespath.org/ for more information and
                        examples.
    --verbose         : Increase logging verbosity. Use --debug for full debug logs.
Try running az account show --output yaml or something similar.
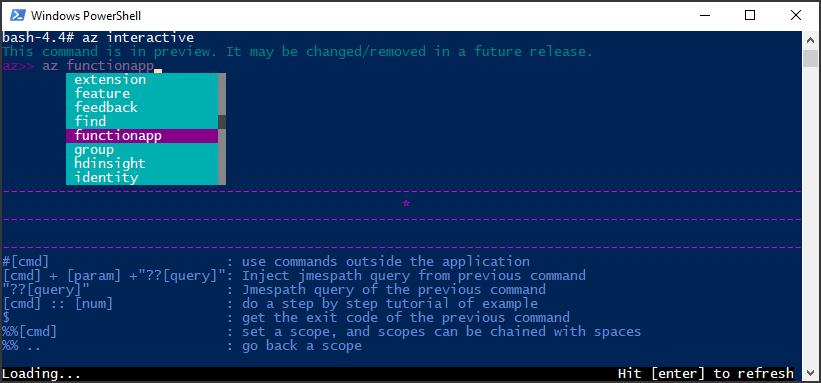
Azure CLI Interactive Mode
Simply run az interactive to start the interactive mode. Of course, you can run az interactive -h to find out more about the interactive mode, like this:
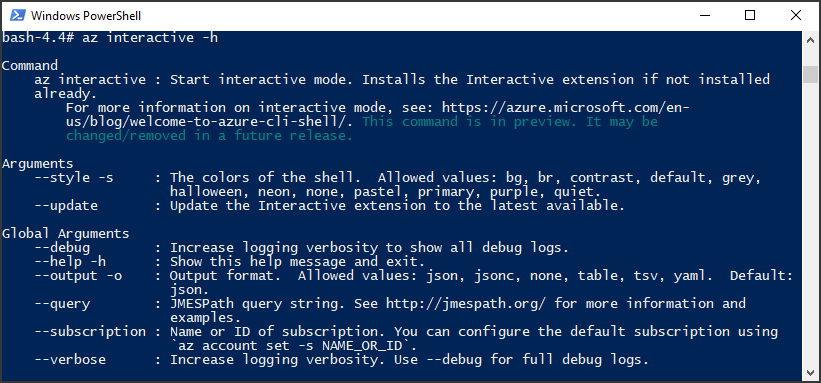
Just in case you want to click on the link, here it is: https://azure.microsoft.com/en-us/blog/welcome-to-azure-cli-shell/
Azure CLI Interactive Mode doesn't work in PowerShell
When I tried to run az interactive in PowerShell, it was just broken, as shown in this animated gif.

I expect that'll be fixed soon or, perhaps more likely, maybe it's because I've done something wrong. I don't know. The important thing is, it's easier for me just to give up and run it in Docker, so that's what I'm going to do. Remember, we're only talking about the az interactive command, which I want to use to learn the Azure CLI. I can still run all the other az commands in PowerShell.
Azure Interactive Does Everything For You
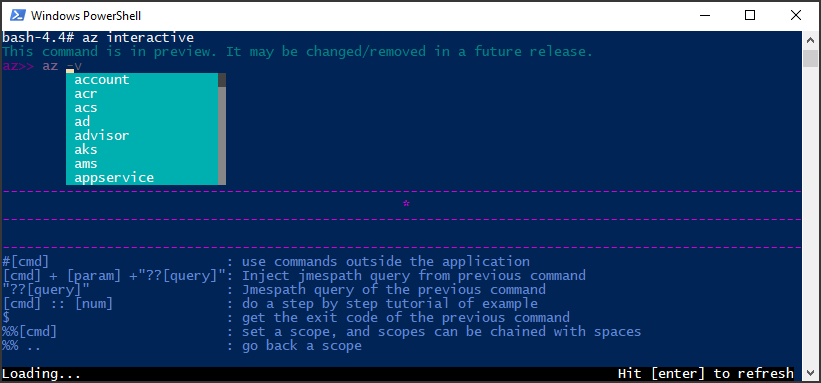
Type az and press the space bar. You'll see a helpful, scrollable pop-up window containing all of the possible commands. You can navigate through these using the cursor keys. You don't actually need to start your commands with az, but you will if you're not using the interactive mode, so I think it doesn't hurt to be consistent.
Note: The first time you type
azand press the space bar, it's quite likely that nothing will happen. Do you see where it says "Loading..." on the menu bar at the bottom-left of the screenshot? I found that it's best to wait a few minutes after you first run theaz interactivecommand. If you fancy a cup of tea or coffee, just after running that command would be a good time to get one.
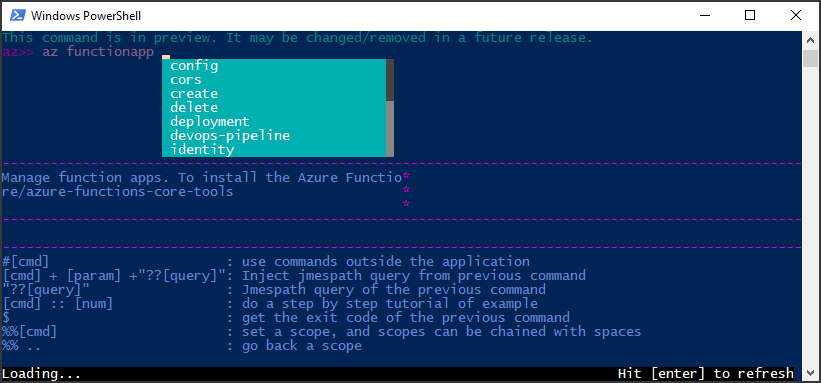
Once you've found the command you want, press the space bar again and it will show you the next context menu.
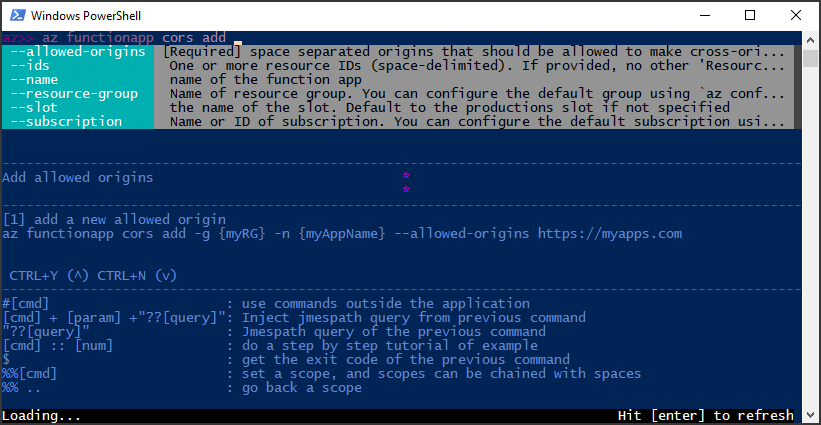
If you need to specify arguments for the command, the display changes to give you specific help for each argument.
After a while, the bottom menu will finish loading, whereupon you'll discover that you can quit the interactive mode with Ctrl+D. Another Ctrl+D will quit the Bash shell and take you back to PowerShell.

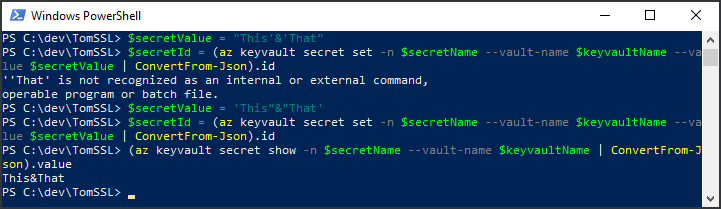
Something to remember about using Bash
It can be useful to split long commands over several lines. Notice that, because we're using Bash, the escape character to split a command over several lines is backslash \ and not backtick `.
In other words, we might write something like this:
bash-4.4# az storage account create \
>   --name tomsslstorageaccount0001 \
>   --location uksouth \
>   --resource-group tomssl-random-name \
>   --sku Standard_LRS
whereas in vanilla PowerShell, we'd do this:
PS C:\dev\TomSSL> az storage account create `
>>   --name tomsslstorageaccount0001 `
>>   --location uksouth `
>>   --resource-group tomssl-random-name `
>>   --sku Standard_LRS
A slightly interesting aside
I hibernated my laptop in the middle of writing this and, when I ran az account show the next day, I was still logged in. That's pretty cool.
Conclusion
If you already use Azure and are used to configuring services through the web portal or through PowerShell cmdlets, you should certainly consider using the Azure CLI as well; it is an extremely powerful way to interact with Azure and has excellent context-sensitive help. Microsoft have really done an excellent job with the documentation here.
If you're new to Azure, the Azure CLI is a great way to get started and you should certainly consider running it in interactive mode, via the command az interactive. I found that the best way to do this was to run it inside a Docker container (which might mean I have misconfigured something, but it doesn't really matter).
In this article, we have learnt just enough to be able to get started and to poke around and have some fun. Please don't use a Production subscription for that.
Simply stated as "Every piece of knowledge must have a single, unambiguous, authoritative representation within a system." ↩︎
