

Summary
A few weeks ago I obtained a second- (or maybe third-) hand HP ProLiant MicroServer Generation 8 (that's honestly what they call it). If I was sensible, I would have bought one new about five years ago when HP were offering a cashback deal. As it is, a second-hand one probably costs more now than it did when it was brand new and it's still a bargain. But perhaps only if you upgrade the CPU and RAM. Here's how I did it. Expect other articles about this device in due course.
Background
Since I've been stuck at home a lot over the last few months, I have decided to do a bit of work on sorting out my home lab (that's just my fancy term for the computers I use to muck about with and to learn new things).
Having obtained a bargainous Gen8 HP MicroServer on eBay, I decided to upgrade the CPU, so I went back to eBay and ordered a second-hand Xeon E3-1265L V2 to replace the stock Celeron G1610T. The important thing to note is that the Xeon has four physical cores with hyperthreading enabled (meaning eight available CPU cores), whereas the Celeron has two cores and no hyperthreading. So the upgrade is effectively giving four times as many CPU cores. Not bad for about £50 (it was sent from China and took about a week to arrive). You can see comparison benchmarks of the two chips here: https://www.cpubenchmark.net/compare/Intel-Celeron-G1610T-vs-Intel-Xeon-E3-1265L-V2/2075vs1486
Update 2021-11-10: Apparently the Xeon E3-1260L is around £25-35 on eBay at the moment and the E3-1265L V2 is around £75. I think this still makes the (slightly slower) E3-1260L the better bargain, but check out the performance comparison in the update below and decide for yourself. Several people have tried the E3-1260L and have told me it works fine.
Update 2021-02-23: It seems that the Xeon E3-1265L V2 now costs about twice as much as when I wrote this article six months ago (thanks to Wormvortex for pointing that out). With that in mind I had a look around and I think it might be better to opt for a Xeon E3-1260L (not the V2 version). Have a look at the CPU comparison here: https://www.cpubenchmark.net/compare/Intel-Celeron-G1610T-vs-Intel-Xeon-E3-1265L-V2-vs-Intel-Xeon-E3-1260L-vs-Intel-Xeon-E3-1265L/2075vs1486vs1203vs2558. The E3-1260L appears to be the second best CPU and is currently available on eBay for under £40 shipped to the UK. I have not tried this CPU, but it should be fine. If you try it, please let me know how it performs in the comments section.
Installing the new CPU is easy but, since I had to unplug a few wires to extract the motherboard I thought I'd better take a few pictures in case I forgot where they all went. I learnt this trick when I was a kid. Mind you, back then I had to make drawings of things as I dismantled them as there weren't any digital cameras. Needless to say, I learnt the drawing trick after carefully laying out all of the different screws I'd removed when dismantling something, only to knock them all on the floor. But I digress.
Procedure
First of all, switch it off and unplug it from the mains (and remove any network cables).
Next, remove the cover from the MicroServer by undoing the thumbscrews at the back and sliding the cover backwards.
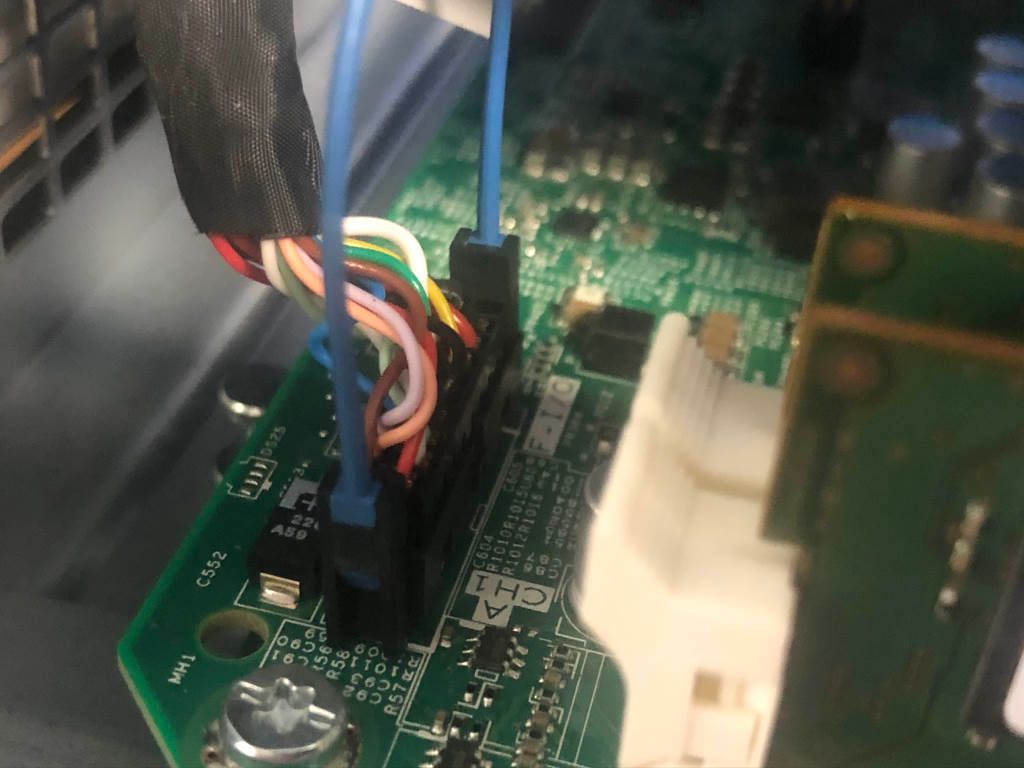
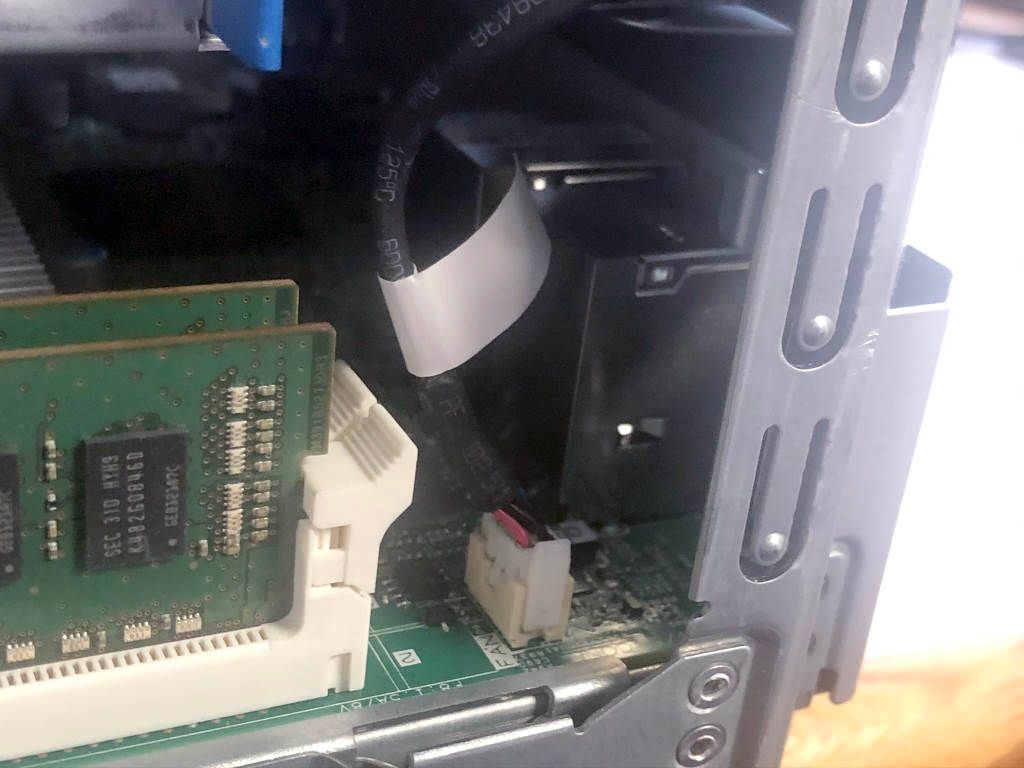
Now undo the clip below the fan grill on the rear and, very gently, start to slide the motherboard tray backwards. Notice which wires are preventing it from coming out. Well, that's what I did. In my case I had to undo these wires:
On the side with the RAM I had to unclip a bunch of wires with a blue "handle" and also a fan wire.
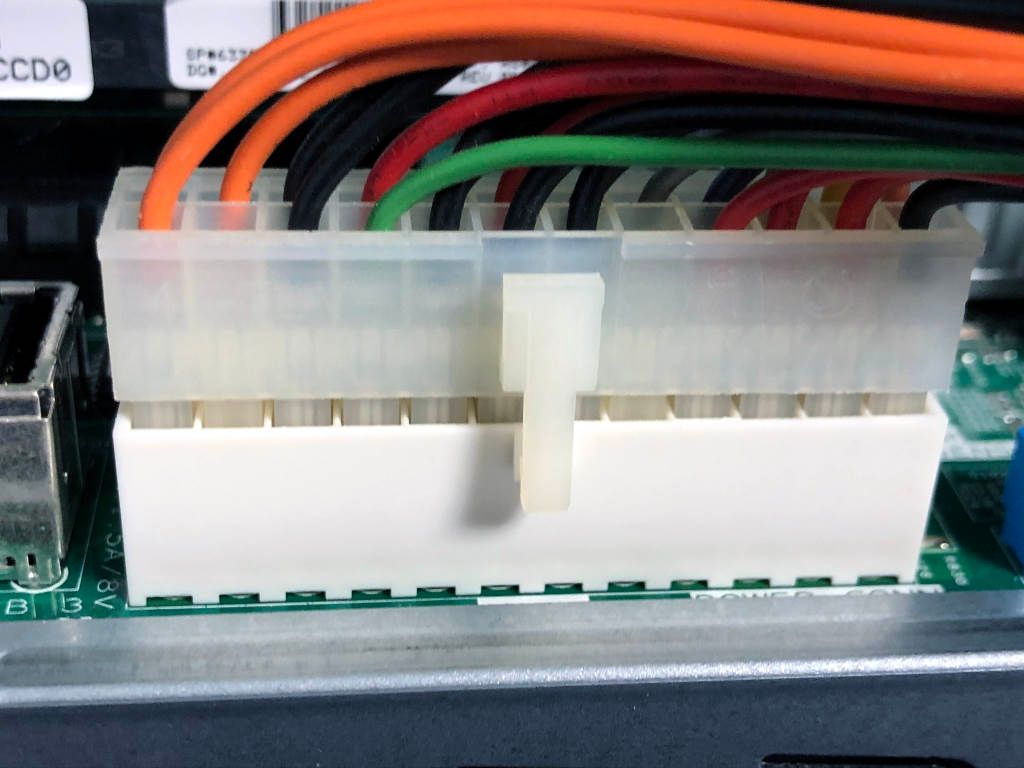
On the other side of the machine, I had to undo the large power connector,
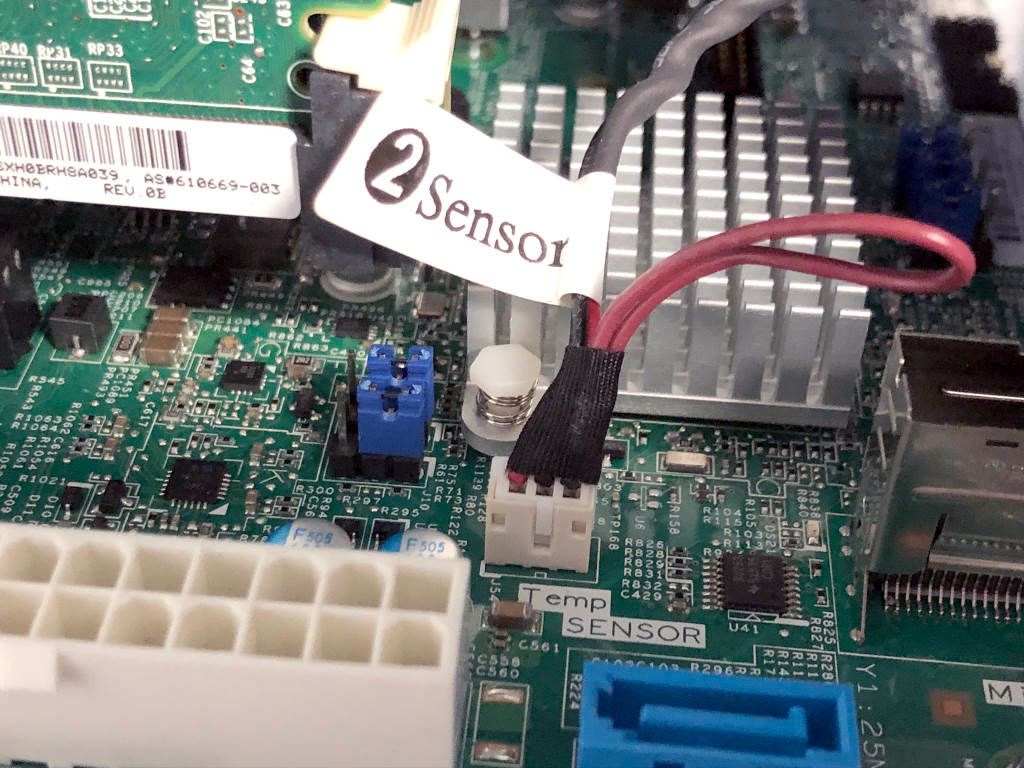
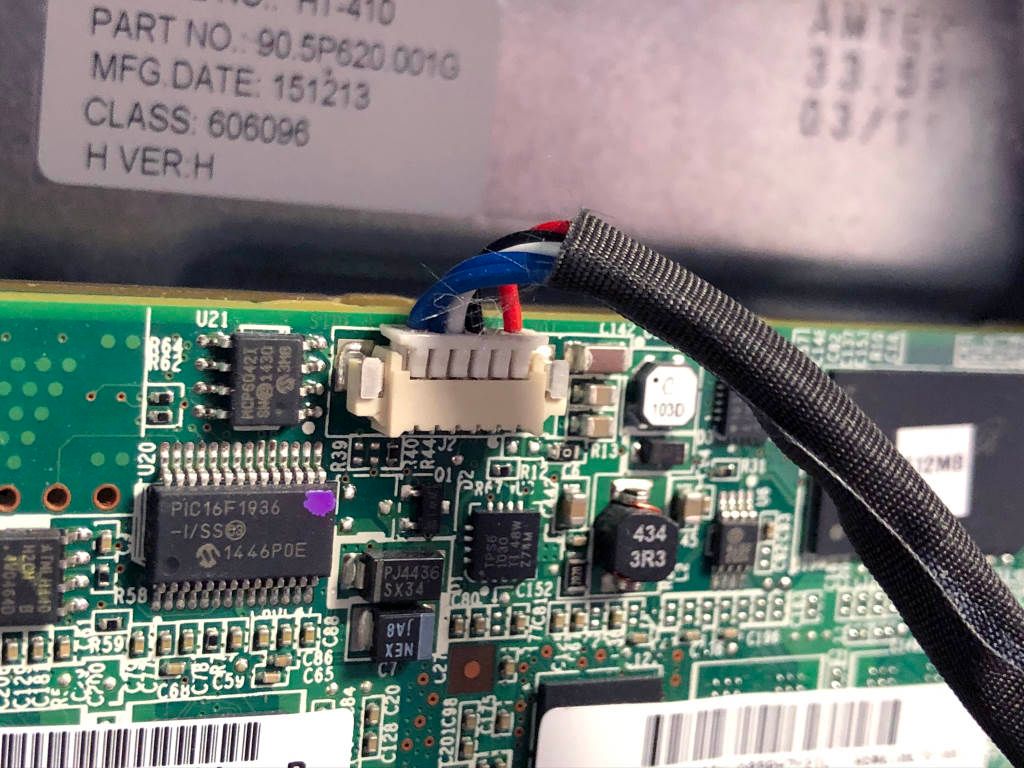
which revealed this (in my case, helpfully-labelled) temperature sensor wire.
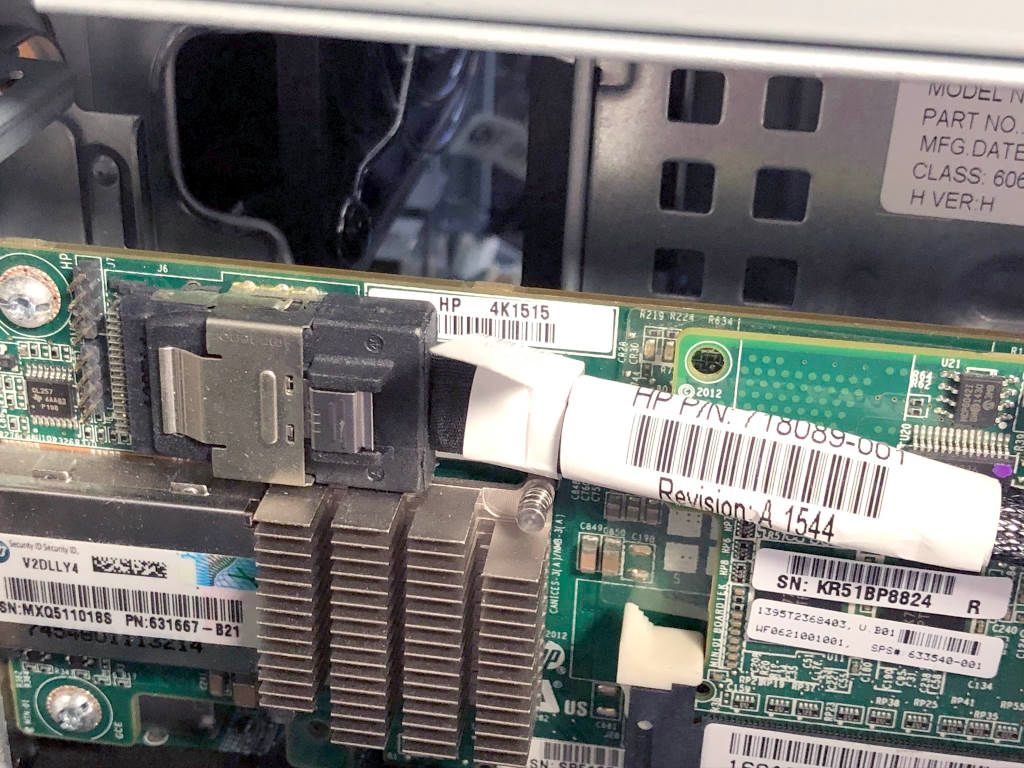
Since my server also came with an HP Smart Array P222 SAS RAID Card, I also had to unplug a couple of wires from that, too. If yours has the stock B120 RAID controller, I reckon you'll have to unplug a cable from the large, squarish silver connector in the right hand side of the temperature sensor picture above.
As I mentioned before, I took these photographs because I knew I'd forget something if I didn't, so I might as well include them here, just in case they might help you.
Here's one of the connections on the P222 card which you probably haven't got.
And here's the other.
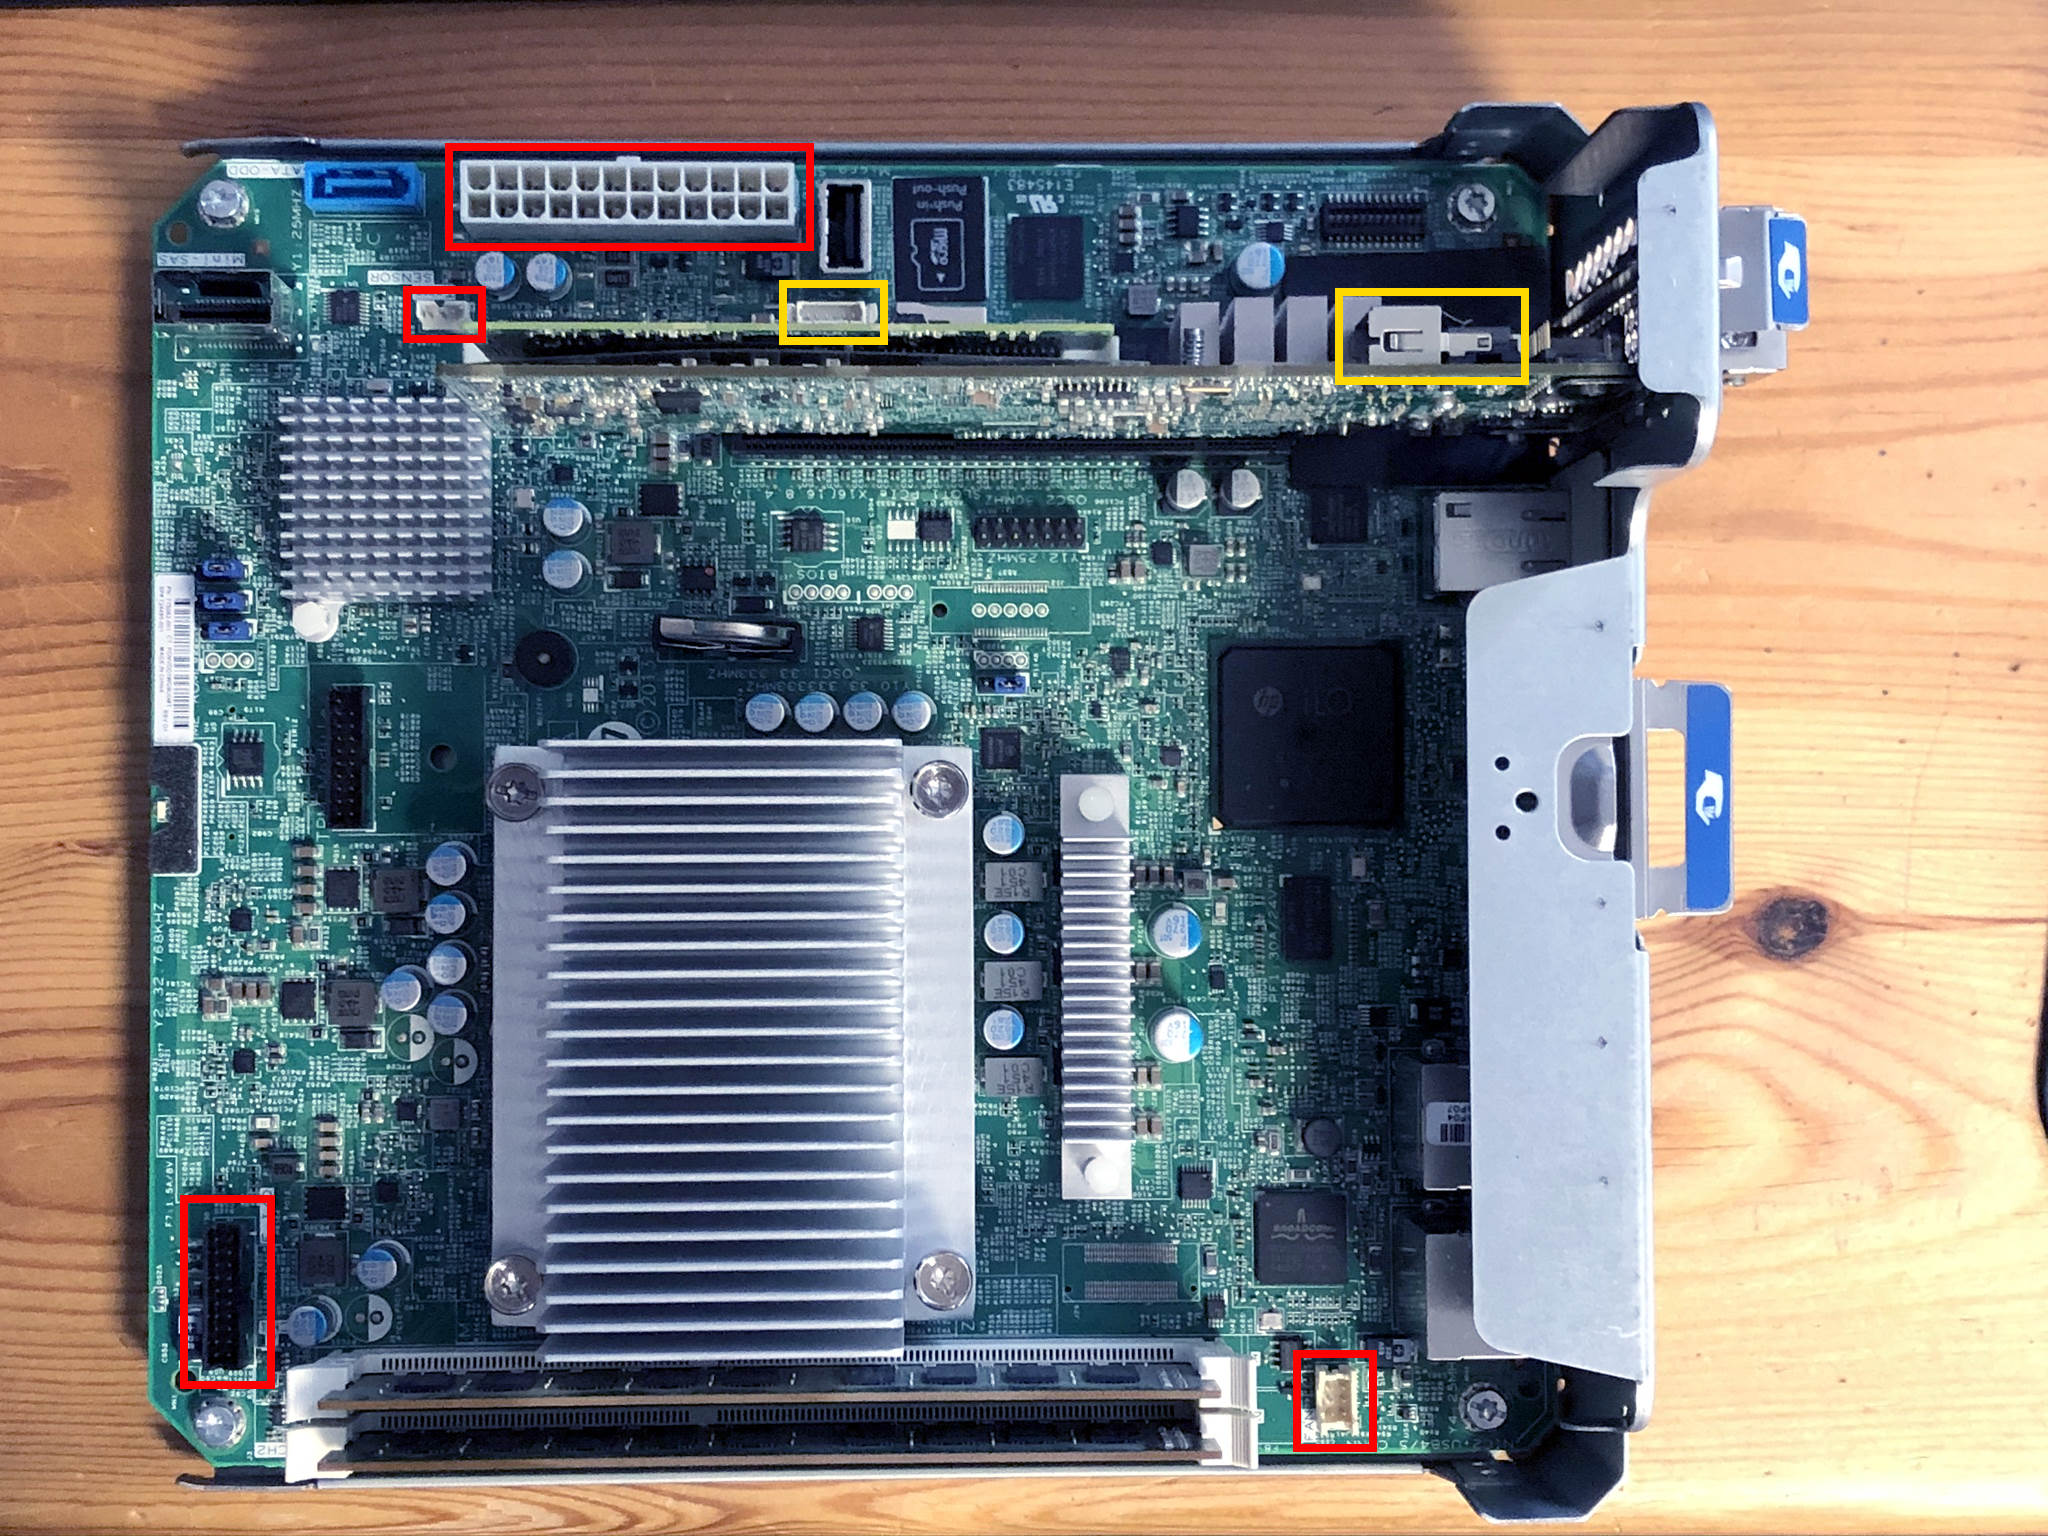
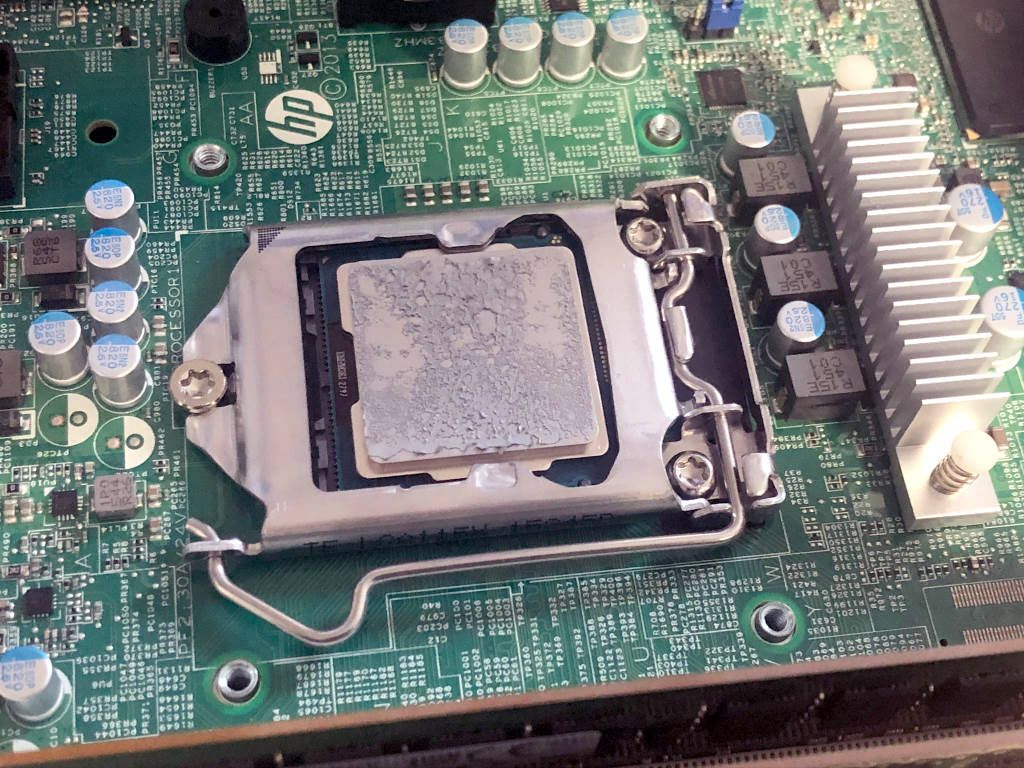
With the motherboard now out of the server, it's time to replace the CPU. Before we do that, here's a quick picture showing where the cables go. The yellow boxes are the P222-specific connectors and the on-board RAID connector is at the top left (I didn't highlight it because it wasn't used in my server).
Note that the CPU heatsink is held on with four screws and that it doesn't have a fan. This is part of the reason I opted for the CPU that I did. The E3-1265L V2 is a 45W CPU and can be passively cooled with this heatsink with no problems.
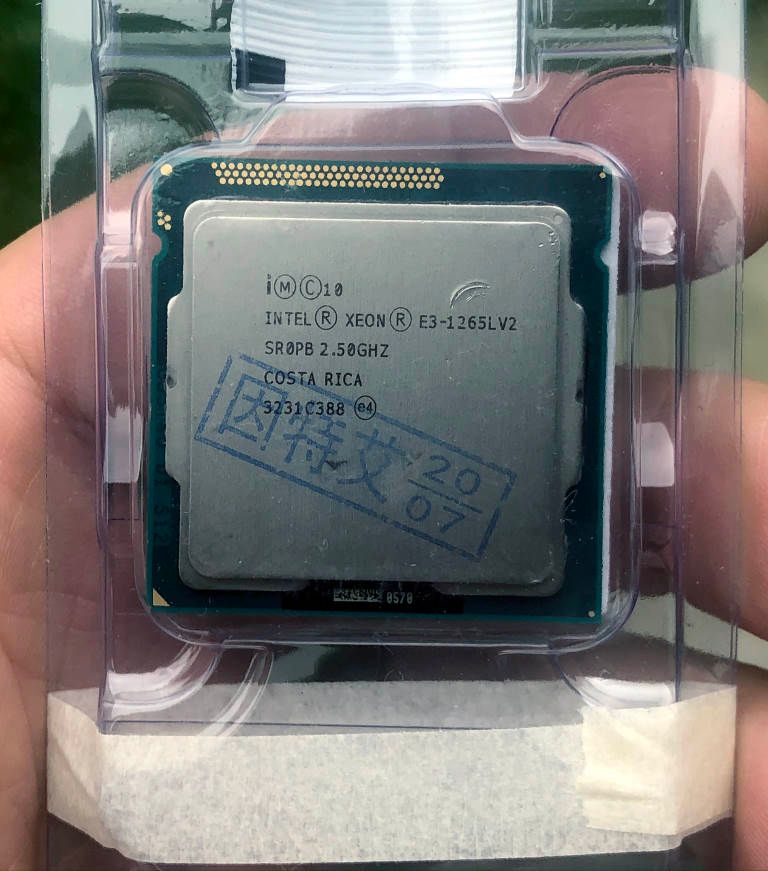
When my "new" CPU arrived, I noticed that the packaging had been damaged. You can see the large gouge above where it says E3-1265L V2. Oh well, I expect the contents are unscathed...
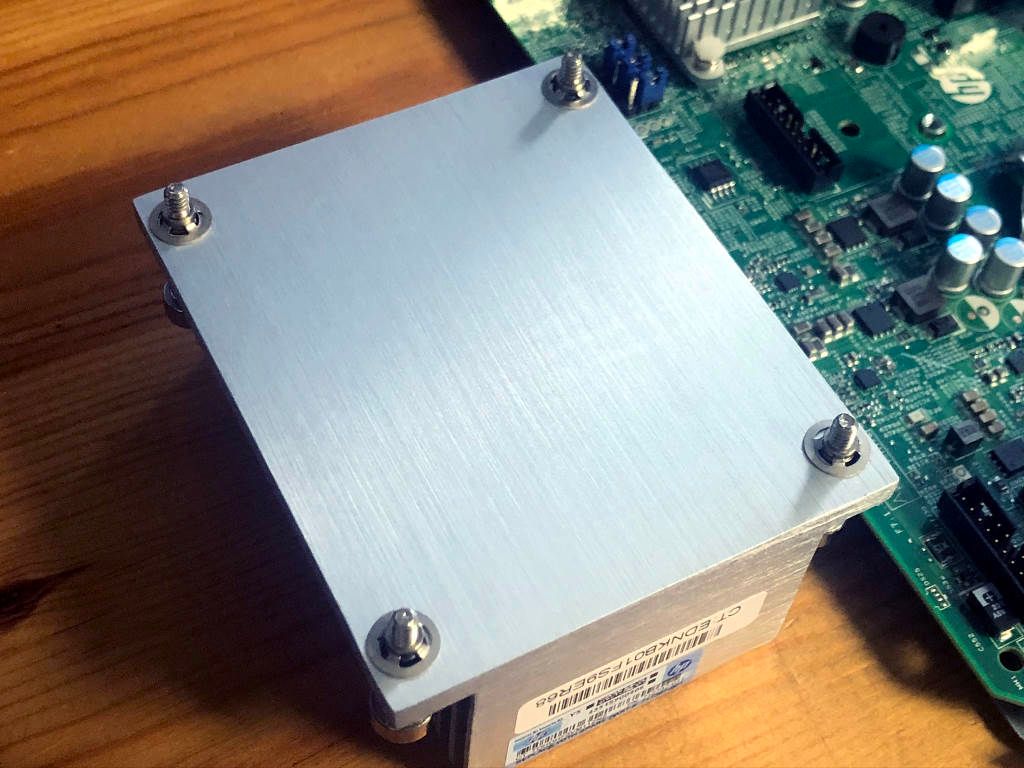
Removing the heatsink was much more difficult than I'd expected, but with a bit of perseverance it came off. Make sure all of the screws are completely undone and don't expect it to be easy.
Next I cleaned the heatsink with some alcohol wipes and it went from this:
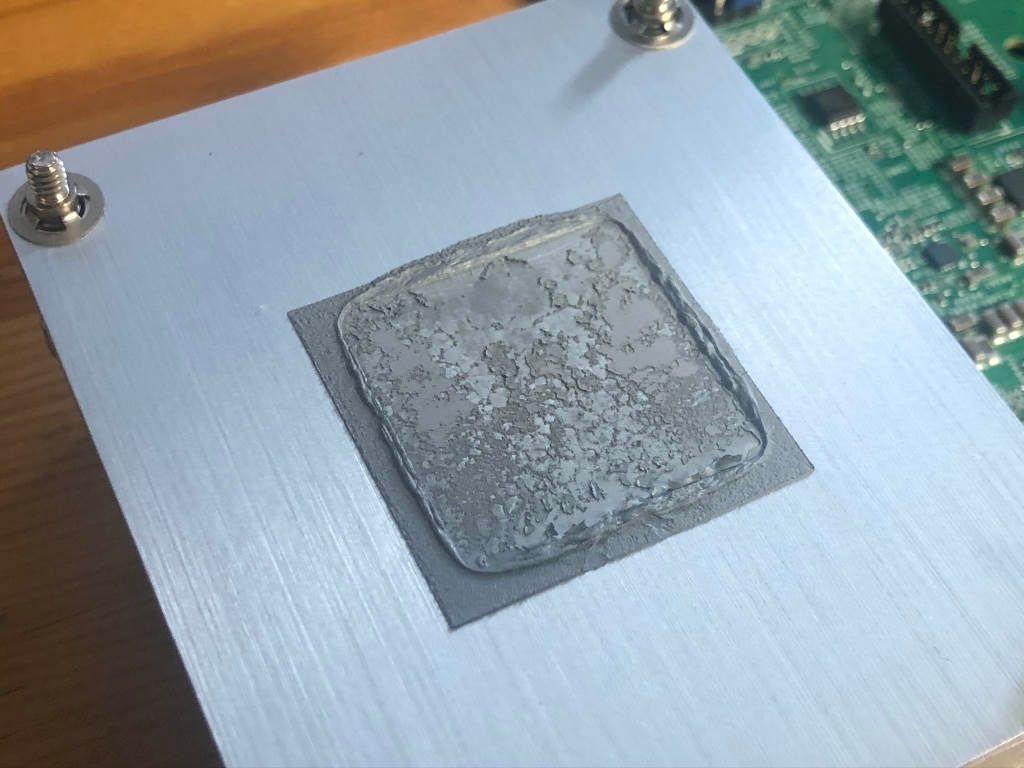
to this (in about ten seconds). That was quite satisfying.
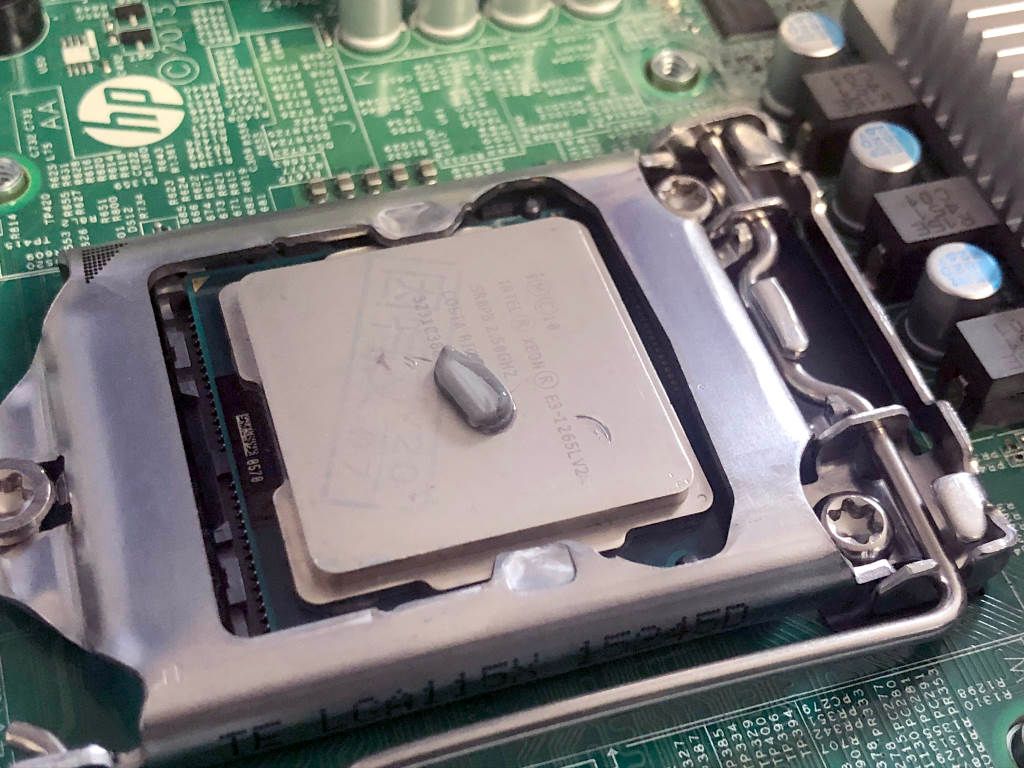
Having removed the old CPU, I opened the packaging of the "new" one and discovered that the massive gouge was, in fact, in the CPU itself. Mind you, since that big square metal block is nearly all heatsink, I didn't let it worry me too much, so I mounted it, cleaned it with an alcohol wipe, let it dry for a minute or two and then applied a bit of Arctic MX-4 thermal compound and remounted the heatsink. You really don't need much of this stuff at all and I've actually put slightly more on than I meant to.
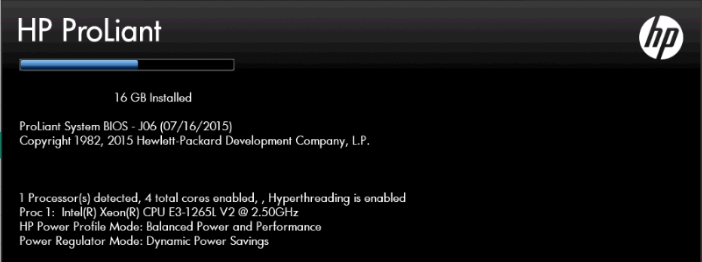
Finally I slid the motherboard tray back into the server and reconnected the wires. Once everything was back together, I added some more RAM. The maximum that you can install in this server is 16GB and it has to be ECC RAM. I bought some cheap on eBay which you can see below. What you possibly can't see is this information from the stickers on it: 8GB 2RX8 PC3L-12800E-11-13-E3 and 8GB DDR3-1600 1.35v DR x8 ECC.

When I powered on the server, the BIOS screen showed that the new CPU and the RAM had been detected correctly.
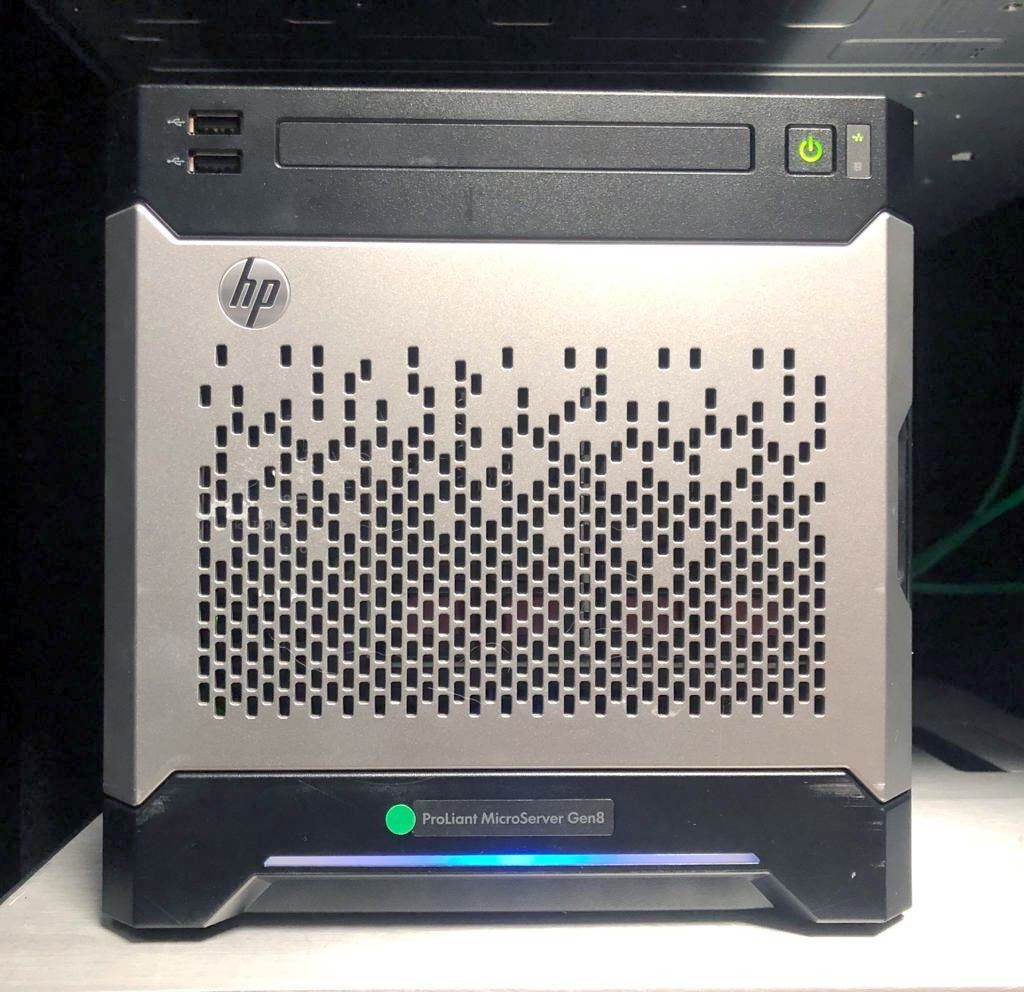
And here is my server up and running.
Conclusion
Upgrading the CPU in an HP Gen 8 MicroServer is really easy and, despite being pretty old, they are still an excellent machine. If you already own one of these machines and it's still got a Celeron in it, then you might want to have a look at buying a second-hand Xeon E3-1265L V2 from eBay for around £50-60. I am now running VMWare ESXi on my machine (more about that another time) and it works really well.
Join the newsletter to receive the latest updates in your inbox.

Hire me for consultancy work